> ## Documentation Index
> Fetch the complete documentation index at: https://docs.semgrep.dev/llms.txt
> Use this file to discover all available pages before exploring further.
# Add a Bitbucket repository to Semgrep Managed Scans
> Add Bitbucket repositories to your Semgrep organization in bulk without adding or changing your existing CI workflows through **Managed Scans**.
## Prerequisites and permissions
Semgrep Managed Scans require one of the following plans:
* Bitbucket Cloud Premium
* Bitbucket Data Center (v8.8 or above for diff-aware scans)
Bitbucket Cloud
You must provide a Bitbucket [workspace access token](https://support.atlassian.com/bitbucket-cloud/docs/create-a-workspace-access-token/) to Semgrep, which can be created by a user with the `Product Admin` role. Once you have Semgrep Managed Scans fully configured, you can update the token provided to Semgrep to one that's more restrictive. The scopes you must assign to the token include:
* `webhook (read and write)`
* `repository (read and write)`
* `pullrequest (read and write)`
* `project (admin)`
* `account (read)`
Webhook permissions are required to support diff-aware scans.
Bitbucket Data Center
You must provide a Bitbucket [HTTP access token](https://confluence.atlassian.com/bitbucketserver/http-access-tokens-939515499.html) to Semgrep. The user who creates the token must be assigned the **Project Admin** role for the project you connect to Semgrep.
#### Create an HTTP access token
Log in to Bitbucket Data Center as a user with the **Project Admin** role for the project you want to scan.
Go to **Profile picture > Manage account > HTTP access tokens**.
Click **Create token**.
Set the token name, permissions, and expiry. Under **Permissions**, select **Project admin** for the project Semgrep will access.
Copy the token value and provide it when you [connect Bitbucket Data Center to Semgrep](/deployment/connect-scm#connect-to-on-premise-orgs-and-projects) or enable Managed Scans.
Project-level webhooks are required to support diff-aware scans.
## Enable Semgrep Managed Scans and scan your first repository
In Semgrep AppSec Platform, click **Projects**.
Click **Scan new project > Semgrep Managed Scan**.
Click **Manage Connections** and then **+ Connect more**.
Select **Bitbucket**.
In the **Set up Managed Scans** page that appears, provide the information needed by Semgrep to connect to your Bitbucket project:
i. Select **Bitbucket** or **Bitbucket Data Center**.
ii. Provide your **Access token**.
iii. Provide the name of your **Bitbucket workspace**.
iv. *For Bitbucket Data Center users only*: provide the **Bitbucket Data Center URL**.
v. Click **Connect**.
Repeat the steps above for each additional Bitbucket workspace you'd like added to Semgrep.
You have successfully set up Managed Scans for your workspace or project.
* After enabling Managed Scans, Semgrep performs a full scan in batches on all the repositories in the workspace.
* Once a repository has been added to Semgrep AppSec Platform, it becomes a **project**. A project in Semgrep AppSec Platform includes all the findings, history, and scan metadata of that repository.
* Projects with a Managed Scan configuration are tagged with `managed-scan`, regardless of whether the project is actively being scanned by Semgrep Managed Scans or not. The **Projects** list also contains pending scans and scans that never started.
## Add additional Bitbucket projects
You can enable Managed Scans for additional repositories after onboarding using the following steps:
In Semgrep AppSec Platform, click **Projects**.
Click **Scan new project > Semgrep Managed Scan**.
In the **Enable Managed Scans for repos** page, select the repositories you want to add to Semgrep Managed Scans.
i. Optional: If you do not see the repository you want to add, click **Can't find your project?** and follow the troubleshooting steps provided.
Select the repositories you want to scan from the list.
Click **Enable Managed Scans**. The **Enable Managed Scans** dialog appears. By default, Semgrep runs both full and diff-aware scans.
Optional: Disable PR or MR diff-aware scans by turning off the **Enable PR/MR scans** toggle.
Click **Enable**.
### If the page does not display any repositories
Ensure that you've connected your Bitbucket account by following the steps in [Connect a source code manager](/deployment/connect-scm) and confirm your token meets the [prerequisites](#prerequisites-and-permissions).
In Semgrep AppSec Platform, click **Projects**.
If the page does not display the repository you want to add, click **Can't find your project? > Sync projects**.
If the page does not display any repositories, click **Sync projects**.
Optional: Perform a hard refresh (Ctrl+F5 or Cmd+Shift+R).
### Convert or migrate an existing Semgrep CI job
You can immediately add any existing project to Managed Scans.
Follow the steps in [Enable Semgrep Managed Scans](#enable-managed-scanning-and-scan-your-first-repository).
Delete the `bitbucket-pipelines.yml` file in your Bitbucket repository if appropriate.
If you plan to continue running some scans in Bitbucket CI/CD Pipelines (for example, using Managed Scans to run weekly full scans but Bitbucket CI/CD Pipelines for diff-aware scans) you can leave the workflow file in place, and edit it to reflect your desired configuration.
**TIP**
Semgrep preserves your findings, scans, and triage history.
## Scan management and configuration
### Manually run a full scan
In Semgrep AppSec Platform, click **Projects**.
Search for your repository's name.
Click the **gear icon** to access the settings page for that repository.
Click **Run a new scan > Rule-based detection**.
> You can manually run a full scan for both primary and non-primary branches.
### Re-run a failed scan or a scan that never finished
In Semgrep AppSec Platform, click **Projects**.
Click on the project name.
Find the scan that failed or never finished using the **Status** column, and click **Details** to open the **Scan logs** dialog.
Ensure that you're on the **Overview** tab of the **Scan logs** dialog, then click **Retry scan**.
### Disable diff-aware scans on PRs
In Semgrep AppSec Platform, click **Projects**.
Search for your repository's name.
Click the **window icon** under **Details** to access the settings page for that repository.
Click the toggle for diff-aware scans.
### Delete a project
In Semgrep AppSec Platform, click **Projects**.
Search for your repository's name.
Click the **window icon** under **Details** to access the settings page for that repository.
Click the dropdown at the header and click **Delete project**.
To delete an archived project:
In Semgrep AppSec Platform, click **Projects**.
Switch to the **Not Scanning** tab of the **Projects** page.
Select the checkbox to **Show archived** projects.
Search for the archived repository's name.
Click the **window icon** under **Details** to access the settings page for that repository.
Click the dropdown at the header and click **Delete project**.
### Configure fail open to prevent diff-aware scans from blocking pull requests and merge requests
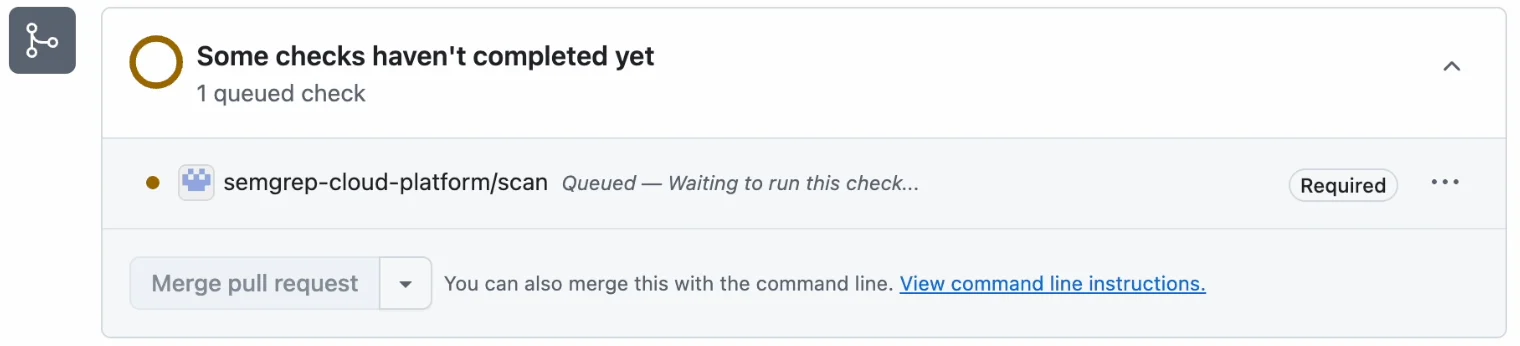
By default, diff-aware managed scans are set to **fail open** if a scan errors out or takes too long. This means that diff-aware scans are marked as successful on the pull request (PR) or merge request (MR), even if they have not completed after the specified timeout. This lets you make the Semgrep status check required in your source code manager (SCM) without blocking someone from merging a PR or MR if the check encounters an unexpected issue or takes too long.
 #### How fail open works
If enabled, the fail open feature is triggered whenever you open a PR or MR.
Initially, Semgrep sends an update to mark the PR or MR as `pending`.
Once the diff-aware scan begins, the PR or MR is updated to a status of `running`.
The diff-aware scan completes, and the PR or MR is updated to a status of `succeeded` or `failed`.
If the diff-aware scan is in `pending` or `running` status longer than the configured timeout, then the fail open process updates the PR or MR to display a status of `succeeded`. This prevents the Semgrep scan from blocking the developer from merging their changes.
If Semgrep marks a PR or MR as `succeeded`, you can merge the PR or MR without waiting for the diff-aware scan to complete. However, if the PR or MR is still open and the scan completes *after* the fail open timeout is reached, Semgrep can still report the findings and mark the status as `failed`.
#### Configure fail open
By default, fail open is enabled. However, you can disable this feature and adjust the timeout value:
Sign in to [Semgrep AppSec Platform](https://semgrep.dev/login).
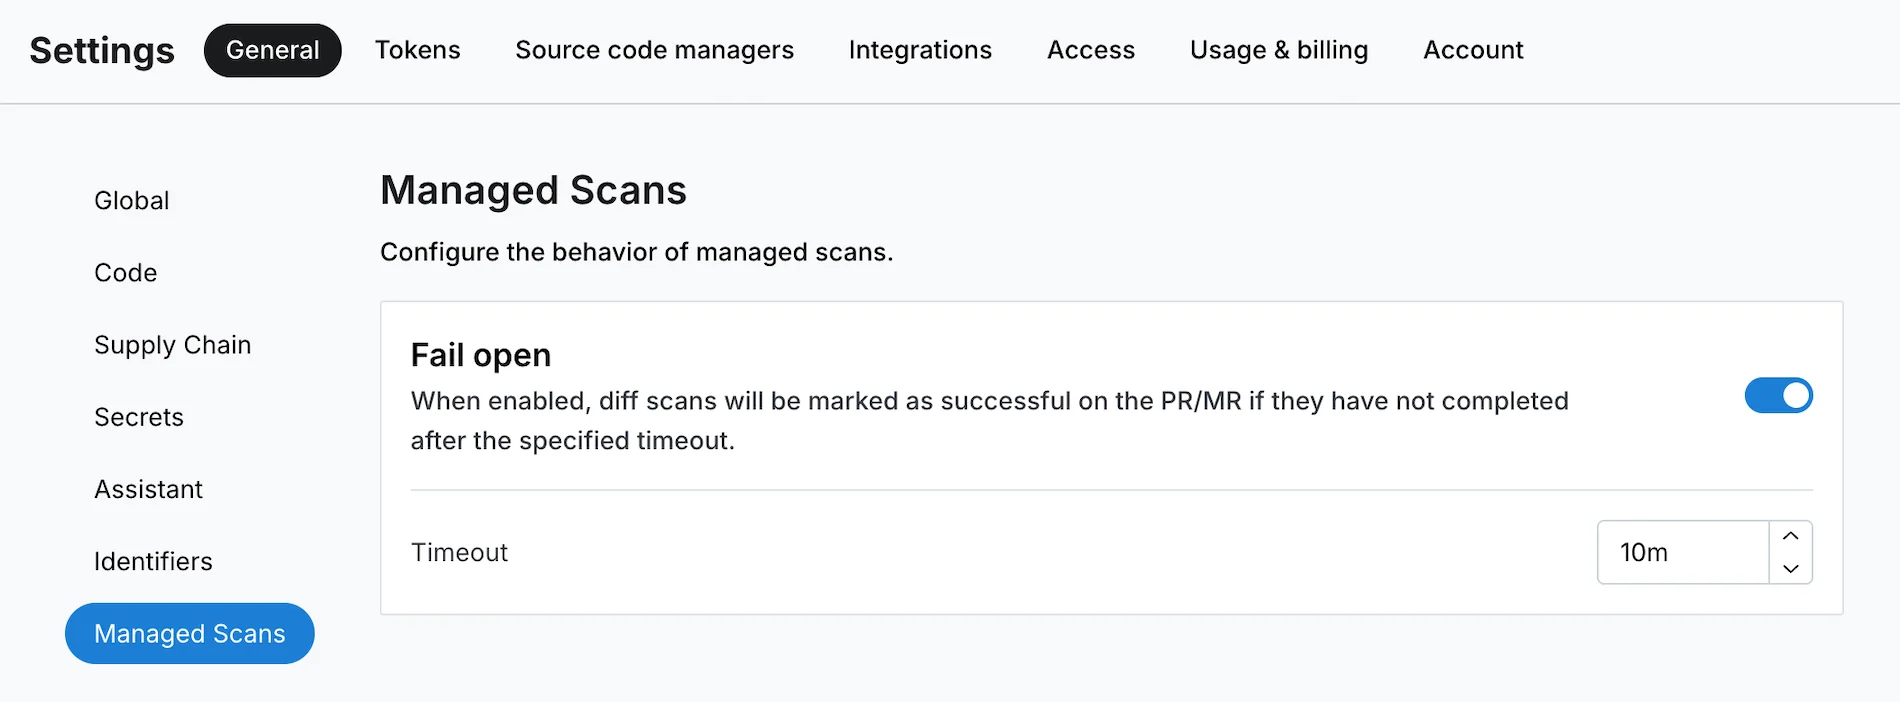
Go to **Settings > General > Managed Scans**.
Click the **Fail open** toggle to turn off this feature.
Set the **Timeout** value in minutes. The default value is **10 minutes**, the minimum value is **1 minute**, and the maximum value is **60 minutes**.
#### How fail open works
If enabled, the fail open feature is triggered whenever you open a PR or MR.
Initially, Semgrep sends an update to mark the PR or MR as `pending`.
Once the diff-aware scan begins, the PR or MR is updated to a status of `running`.
The diff-aware scan completes, and the PR or MR is updated to a status of `succeeded` or `failed`.
If the diff-aware scan is in `pending` or `running` status longer than the configured timeout, then the fail open process updates the PR or MR to display a status of `succeeded`. This prevents the Semgrep scan from blocking the developer from merging their changes.
If Semgrep marks a PR or MR as `succeeded`, you can merge the PR or MR without waiting for the diff-aware scan to complete. However, if the PR or MR is still open and the scan completes *after* the fail open timeout is reached, Semgrep can still report the findings and mark the status as `failed`.
#### Configure fail open
By default, fail open is enabled. However, you can disable this feature and adjust the timeout value:
Sign in to [Semgrep AppSec Platform](https://semgrep.dev/login).
Go to **Settings > General > Managed Scans**.
Click the **Fail open** toggle to turn off this feature.
Set the **Timeout** value in minutes. The default value is **10 minutes**, the minimum value is **1 minute**, and the maximum value is **60 minutes**.
 ## Disable webhooks
Performing diff-aware Managed Scans of Bitbucket projects requires webhooks to be enabled. Webhooks are enabled by default when you add Bitbucket as a source code manager when setting up Semgrep Managed Scans. You can disable webhooks at any time by following these steps:
In Semgrep AppSec Platform, go to [Settings > Source code managers](https://semgrep.dev/orgs/-/settings/source-code).
Find your Bitbucket connection, and click the toggle to disable **Incoming webhooks**.
This will stop any diff-aware scans of your projects.
## Revoke Semgrep's access to your repositories
The following steps revoke the code access you previously granted Semgrep for all repositories you selected.
In Semgrep AppSec Platform, click **Settings > Source Code Managers**.
On the entry of the SCM you want to remove, click **Remove app**.
Click **Remove** to confirm.
## Turn off Managed Scans for specific repositories in Semgrep AppSec Platform
Sign in to Semgrep AppSec Platform.
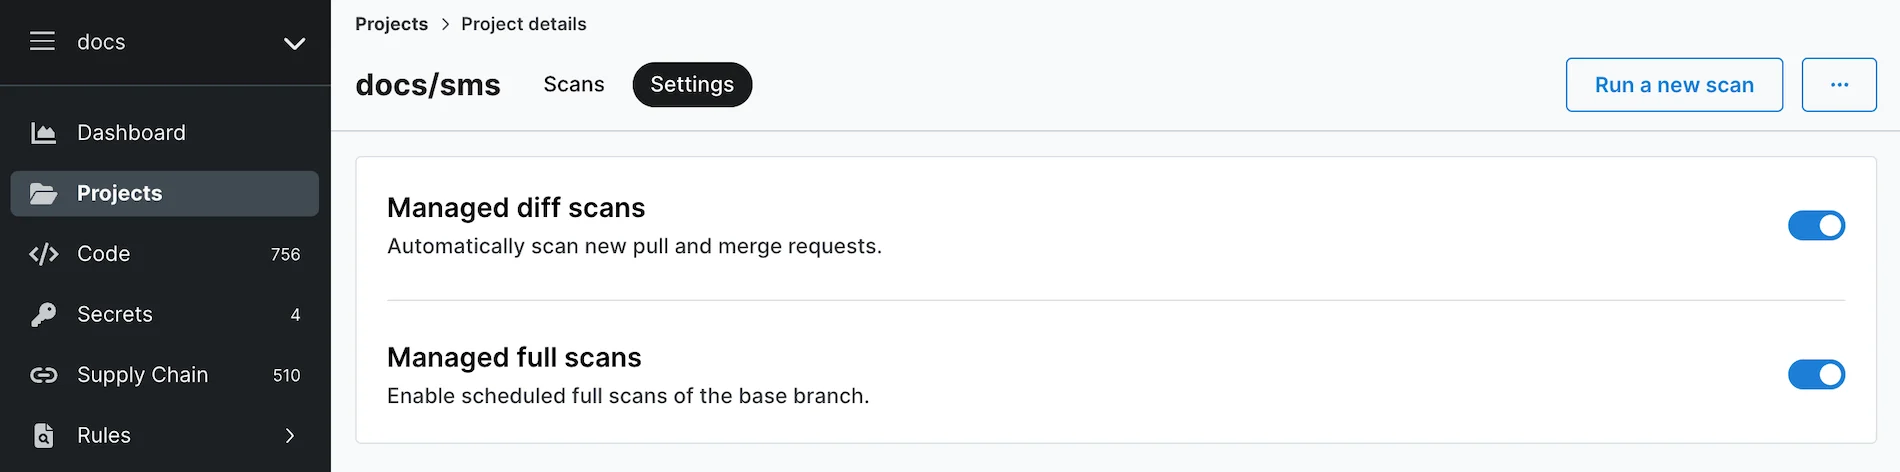
Go to Projects and find the project you no longer want scanned with Semgrep Managed Scanning. Click the project's **Details** page > **Settings** tab.
Toggle the switch for **Managed diff scans** to turn off scans of new pull requests and merge requests and **Managed full scans** to turn off full scans of the base branch.
## Disable webhooks
Performing diff-aware Managed Scans of Bitbucket projects requires webhooks to be enabled. Webhooks are enabled by default when you add Bitbucket as a source code manager when setting up Semgrep Managed Scans. You can disable webhooks at any time by following these steps:
In Semgrep AppSec Platform, go to [Settings > Source code managers](https://semgrep.dev/orgs/-/settings/source-code).
Find your Bitbucket connection, and click the toggle to disable **Incoming webhooks**.
This will stop any diff-aware scans of your projects.
## Revoke Semgrep's access to your repositories
The following steps revoke the code access you previously granted Semgrep for all repositories you selected.
In Semgrep AppSec Platform, click **Settings > Source Code Managers**.
On the entry of the SCM you want to remove, click **Remove app**.
Click **Remove** to confirm.
## Turn off Managed Scans for specific repositories in Semgrep AppSec Platform
Sign in to Semgrep AppSec Platform.
Go to Projects and find the project you no longer want scanned with Semgrep Managed Scanning. Click the project's **Details** page > **Settings** tab.
Toggle the switch for **Managed diff scans** to turn off scans of new pull requests and merge requests and **Managed full scans** to turn off full scans of the base branch.
 ## Appendices
### Scan logs
To view your scan logs in Semgrep AppSec Platform, go to **Projects**, then click on the project name. The projects in the list are sorted by scan date, with the most recent scans listed first.
**INFO**
It can take a few minutes for your latest scan logs to appear. However, if the logs do not update 15 minutes after the scan, there may be issues with the scan itself.
### Scan statistics
**Scan statistics**, such as how many of your repositories are being scanned, the scan success rate, and so on, can be provided once a week upon request. Contact your Semgrep account manager to request scan statistics.
## Appendices
### Scan logs
To view your scan logs in Semgrep AppSec Platform, go to **Projects**, then click on the project name. The projects in the list are sorted by scan date, with the most recent scans listed first.
**INFO**
It can take a few minutes for your latest scan logs to appear. However, if the logs do not update 15 minutes after the scan, there may be issues with the scan itself.
### Scan statistics
**Scan statistics**, such as how many of your repositories are being scanned, the scan success rate, and so on, can be provided once a week upon request. Contact your Semgrep account manager to request scan statistics.