> ## Documentation Index
> Fetch the complete documentation index at: https://docs.semgrep.dev/llms.txt
> Use this file to discover all available pages before exploring further.
# Single-sign on (SSO) configuration
**YOUR DEPLOYMENT JOURNEY**
* You have gained the necessary [resource access and permissions](/deployment/checklist) required for deployment.
* You have [created a Semgrep account and organization](/deployment/create-account-and-orgs).
* You are an admin for both your Semgrep deployment and your IdP provider.
* For GitHub and GitLab users: You have [connected your source code manager](/deployment/connect-scm).
This article walks you through single-sign on (SSO) configuration. Semgrep supports SSO through [OpenID Connect / OAuth 2.0](#openid-connect--oauth-20) and [SAML 2.0](#saml-20).
After setting up SSO, users are provisioned and managed on your IdP. Semgrep grants access to the deployment to any user at the configured domain who logs in and has the correct permissions in the IdP. If a user attempts to log in through GitHub or GitLab with an email at your configured domain, Semgrep prompts them to log in using corporate SSO instead.
### OpenID Connect / OAuth 2.0
**MICROSOFT ENTRA ID**
Semgrep AppSec Platform does not support using OpenID with Microsoft Entra ID. Follow the instructions to [set up SAML SSO with Microsoft Entra ID](/kb/semgrep-appsec-platform/saml-microsoft-entra-id) instead.
To set up SSO in Semgrep AppSec Platform:
Sign in to [Semgrep AppSec Platform](https://semgrep.dev/login).
Go to [**Settings > Access > Login methods**](https://semgrep.dev/orgs/-/settings/access/loginMethods).
In the **Single sign-on (SSO)** section, provide a valid **Email domain**, then click **Initialize**.
The **Configure Single Sign-On** dialog appears. Begin by selecting your identity provider, or choose **Custom OIDC**.
Follow the instructions provided on the subsequent **Configure Single Sign-On** dialog pages to complete this process. When you've completed the required steps, use **Test sign-in** to test the connection.
Once test sign-in has passed, close the test page. Verify that the **Connection details** shown on the **Connection activated** screen are correct and close the dialog.
Verify that the **Connection status** is now **active** under the **Single sign-on (SSO)** section in Semgrep AppSec Platform.
To use the new connection, log out of Semgrep, then log back in using SSO.
If you encounter issues during the setup process, please [reach out to support](/support) for assistance.
### SAML 2.0
**GOOGLE WORKSPACE SAML**
If you're using Google Workspace SAML, see [SAML Single Sign-on with Google Workspace](/kb/semgrep-appsec-platform/saml-google-workspace) for specific guidance.
SAML2.0 is configured through **Semgrep AppSec Platform**. To set up SSO:
Create a SAML app with your authentication provider.
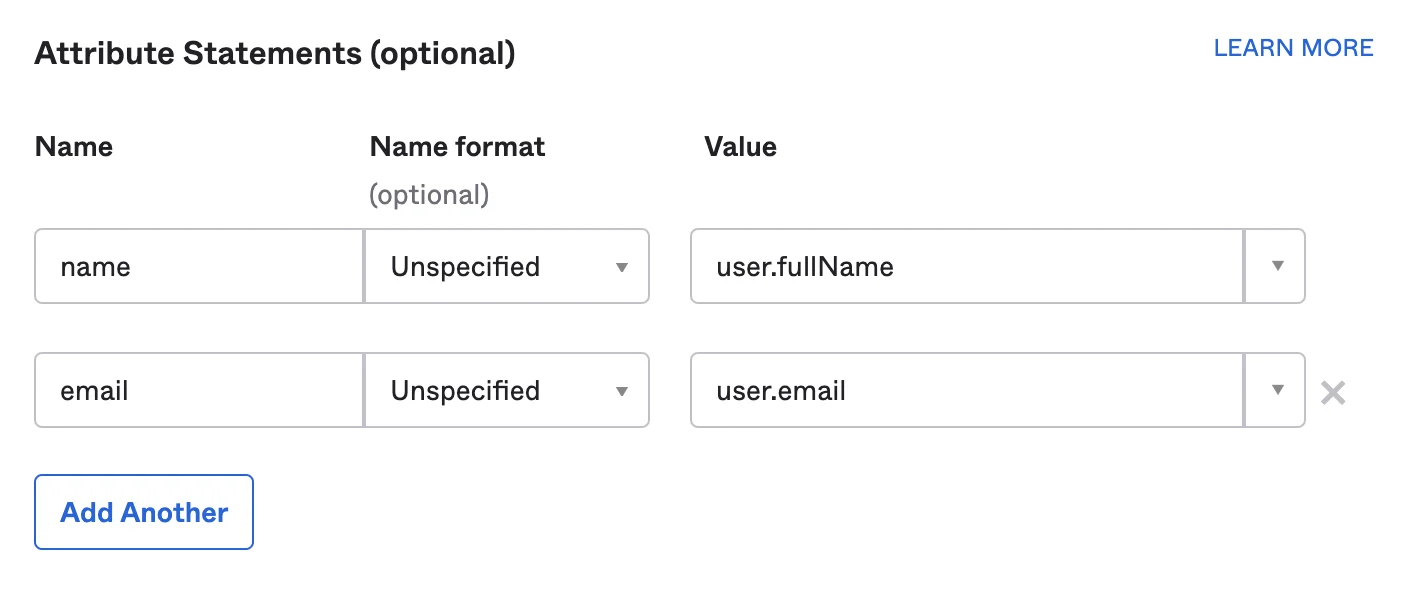
With your authentication provider, add in two attribute statements: `name` and `email`.
Sign in to [Semgrep AppSec Platform](https://semgrep.dev/login).
Go to [**Settings > Access > Login methods**](https://semgrep.dev/orgs/-/settings/access/loginMethods).
In the **Single sign-on (SSO)** section, provide a valid **Email domain**, then click **Initialize**.
The **Configure Single Sign-On** dialog appears to guide you through the remaining configuration steps. Begin by selecting your identity provider, or choose **Custom SAML**.
Follow the instructions provided on the subsequent **Configure Single Sign-On** dialog pages to complete this process. If prompted, add in the requested attribute statements. Semgrep recommends the following mappings:
| Name | Value |
| :------------------------------------------------------------------------------------- | :------------------------------- |
| id | `user.login` **OR** `user.email` |
| email | `user.email` |
| firstName | `user.firstName` |
| lastName | `user.lastName` |
| When you've completed the required steps, use **Test sign-in** to test the connection. | |
Once test sign-in has passed, close the test page. Verify that the **Connection details** shown on the **Connection activated** screen are correct and close the dialog.
Verify that the **Connection status** is now **active** under the **Single sign-on (SSO)** section in Semgrep AppSec Platform.
To use the new connection, log out of Semgrep, then log back in using SSO.
### OpenID Connect / OAuth 2.0
**MICROSOFT ENTRA ID**
Semgrep AppSec Platform does not support using OpenID with Microsoft Entra ID. Follow the instructions to [set up SAML SSO with Microsoft Entra ID](/kb/semgrep-appsec-platform/saml-microsoft-entra-id) instead.
To set up SSO in Semgrep AppSec Platform:
Sign in to Semgrep AppSec Platform.
Navigate to **[Settings > Access > Login methods](https://semgrep.dev/orgs/-/settings/access/loginMethods)**.
Click **Add SSO configuration** and select **OpenID SSO**.
Provide a **Display name** and the **Email domain**.
Copy the **Redirect URL**, and provide it to your authentication provider.
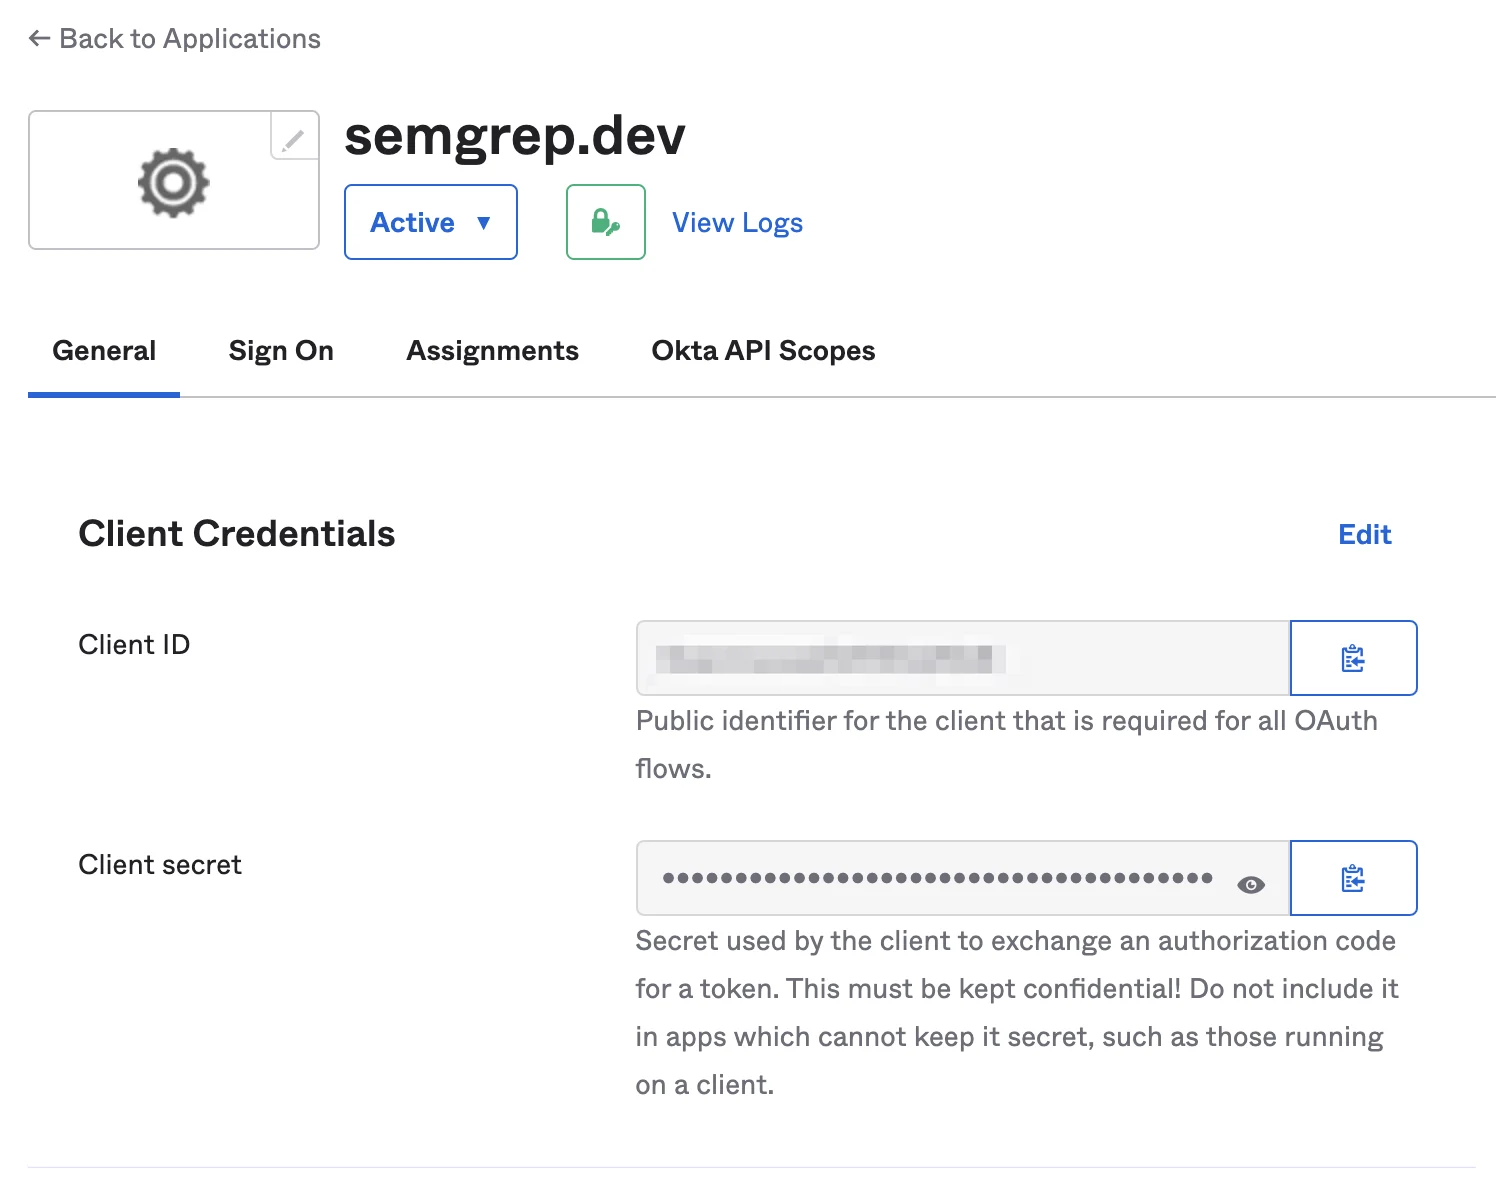
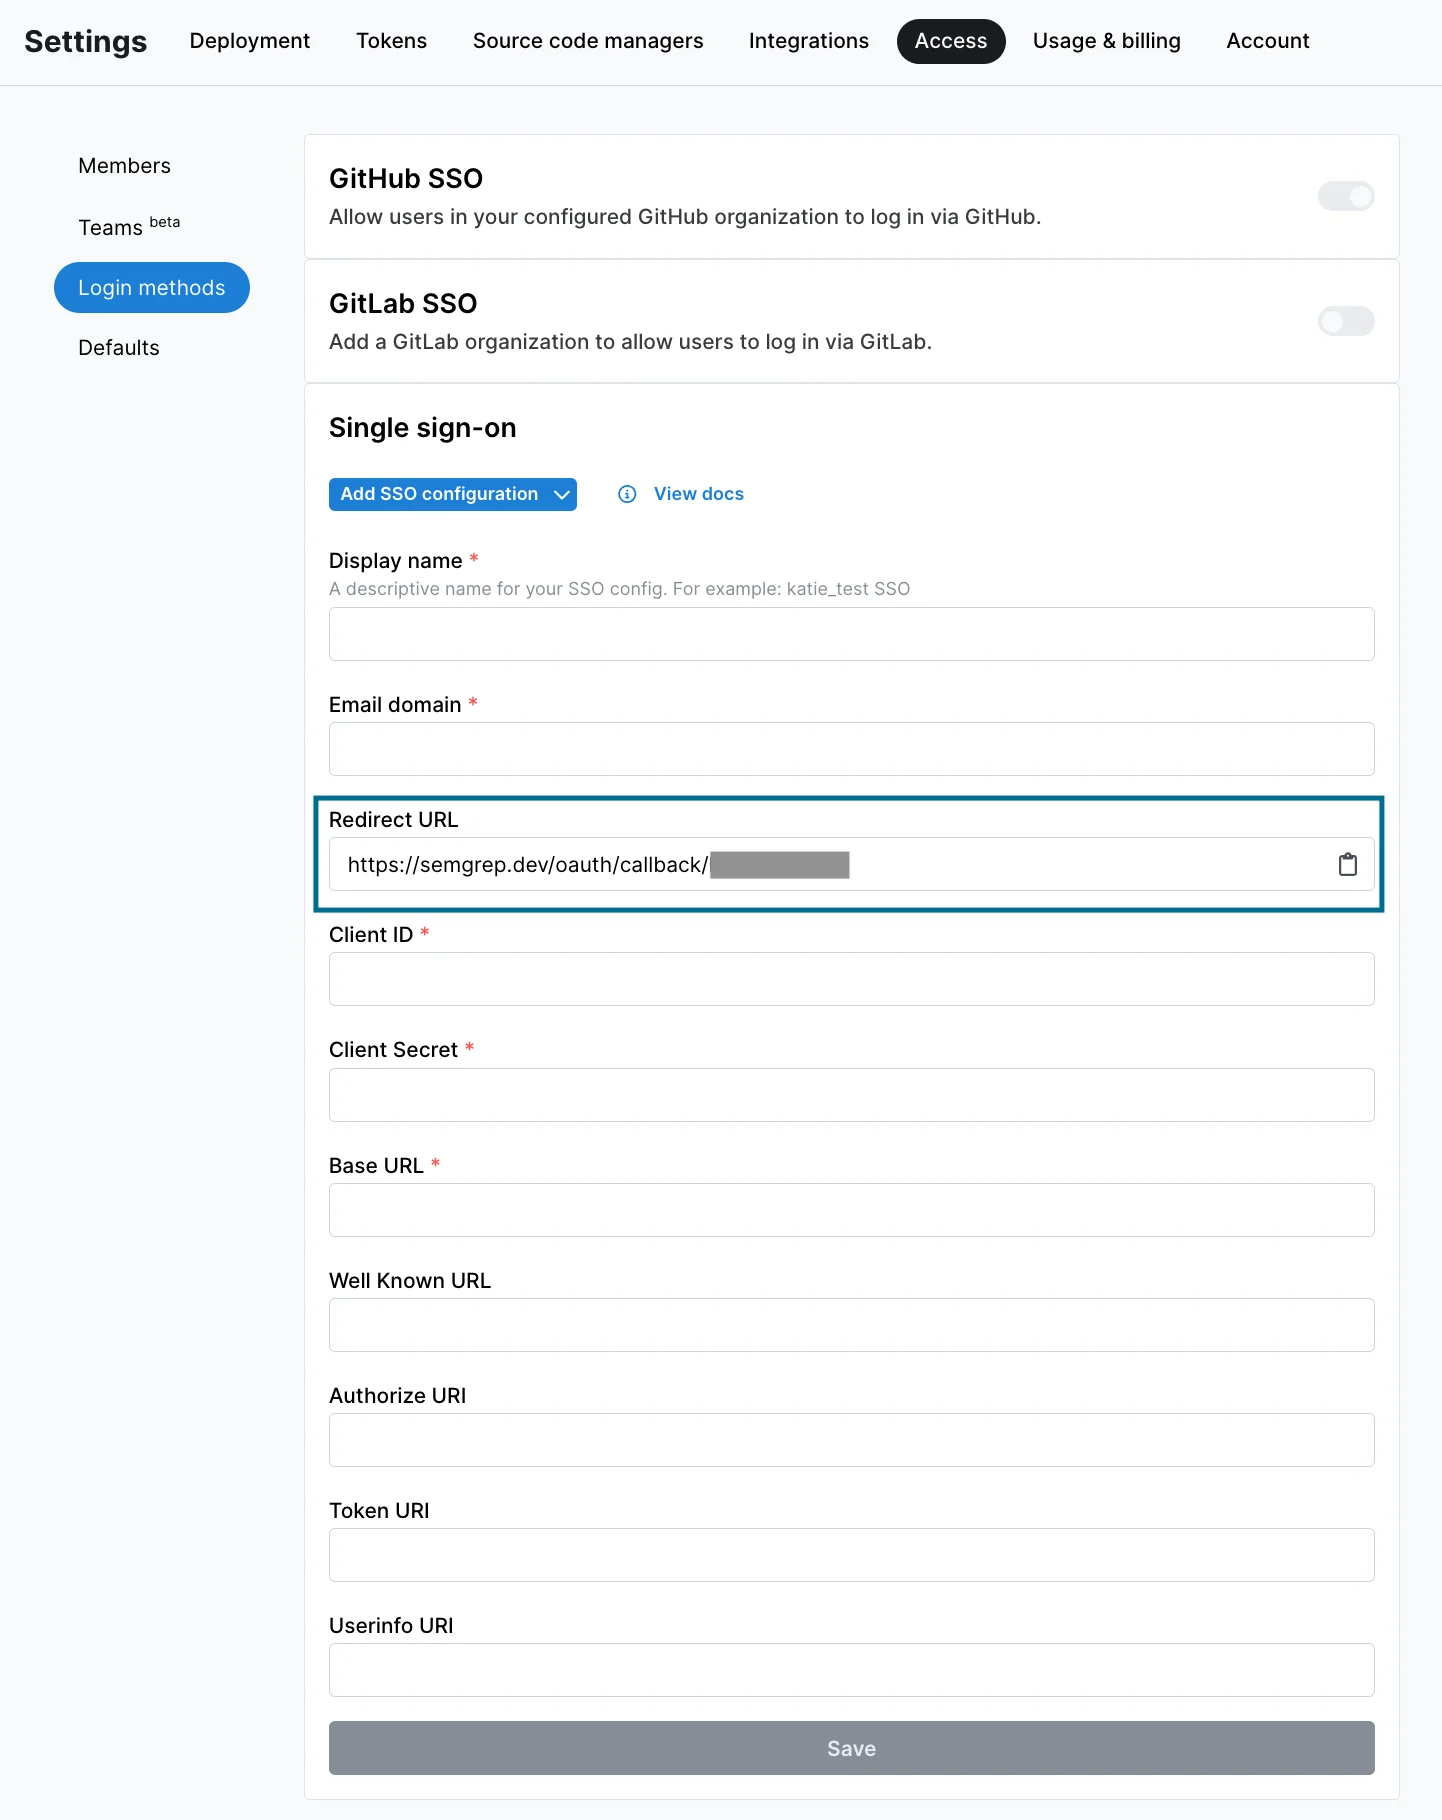 Generate a **Client ID** and **Client Secret** through your authentication provider and paste these values into Semgrep.
 From your authentication provider, copy the **Base URL** value, and provide it to Semgrep. For example, if you're using Okta SSO, the base URL is the **Okta domain**.
Optional: provide the following values from your authentication provider if necessary:
* **Well Known URL**
* **Authorize URI**
* **Token URI**
* **Userinfo URI**
Click **Save** to proceed.
If you encounter issues during the setup process, please [reach out to support](/support) for assistance.
### SAML 2.0
**GOOGLE WORKSPACE SAML**
If you're using Google Workspace SAML, see [SAML Single Sign-on with Google Workspace](/kb/semgrep-appsec-platform/saml-google-workspace) for specific guidance.
SAML2.0 is configured through **Semgrep AppSec Platform**. To set up SSO:
Create a SAML app with your authentication provider.
From your authentication provider, copy the **Base URL** value, and provide it to Semgrep. For example, if you're using Okta SSO, the base URL is the **Okta domain**.
Optional: provide the following values from your authentication provider if necessary:
* **Well Known URL**
* **Authorize URI**
* **Token URI**
* **Userinfo URI**
Click **Save** to proceed.
If you encounter issues during the setup process, please [reach out to support](/support) for assistance.
### SAML 2.0
**GOOGLE WORKSPACE SAML**
If you're using Google Workspace SAML, see [SAML Single Sign-on with Google Workspace](/kb/semgrep-appsec-platform/saml-google-workspace) for specific guidance.
SAML2.0 is configured through **Semgrep AppSec Platform**. To set up SSO:
Create a SAML app with your authentication provider.
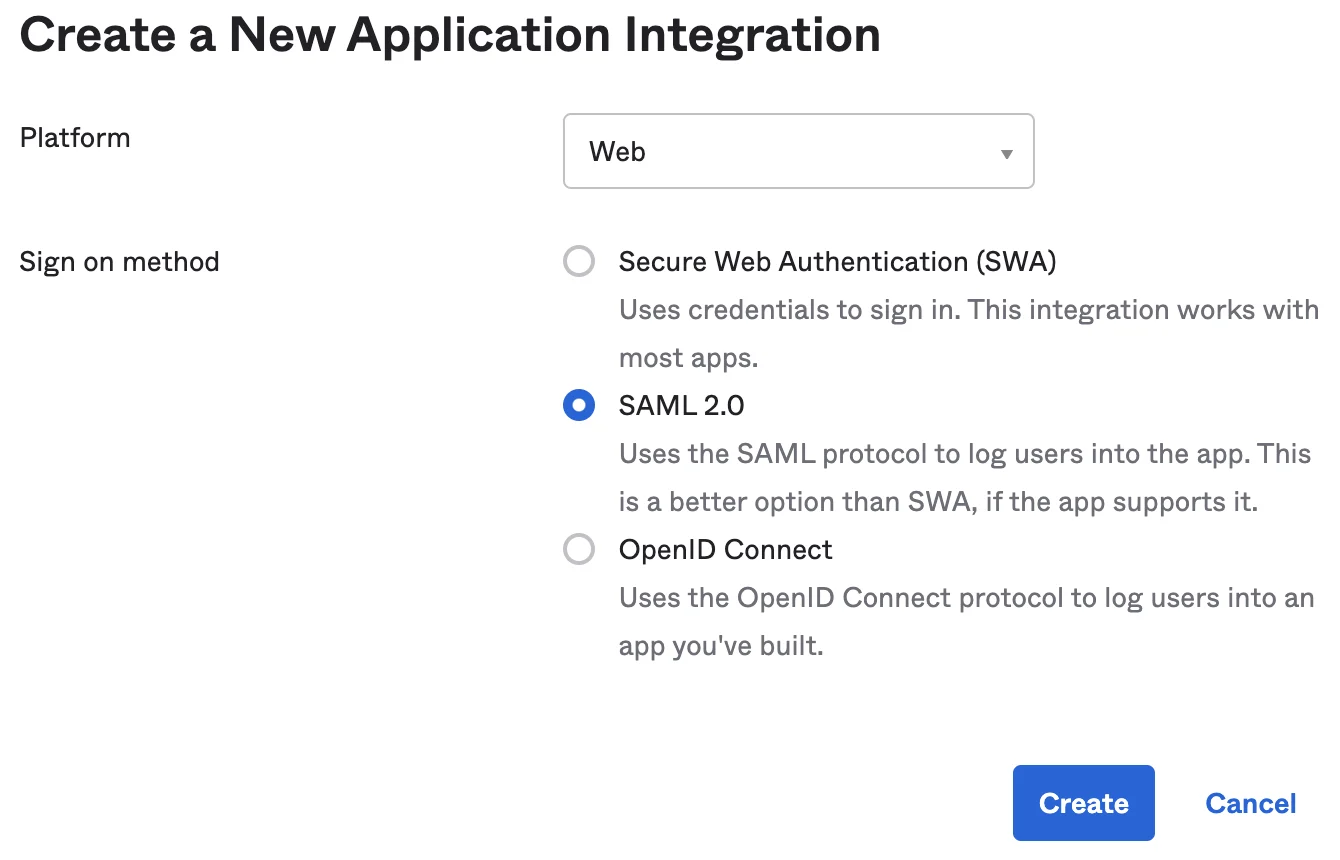 With your authentication provider, add in two attribute statements: `name` and `email`.
 Sign in to Semgrep AppSec Platform.
Navigate to **[Settings > Access > Login methods](https://semgrep.dev/orgs/-/settings/access/loginMethods)**.
Click **Add SSO configuration** and select **SAML2 SSO**.
Provide a **Display name** and the **Email domain**.
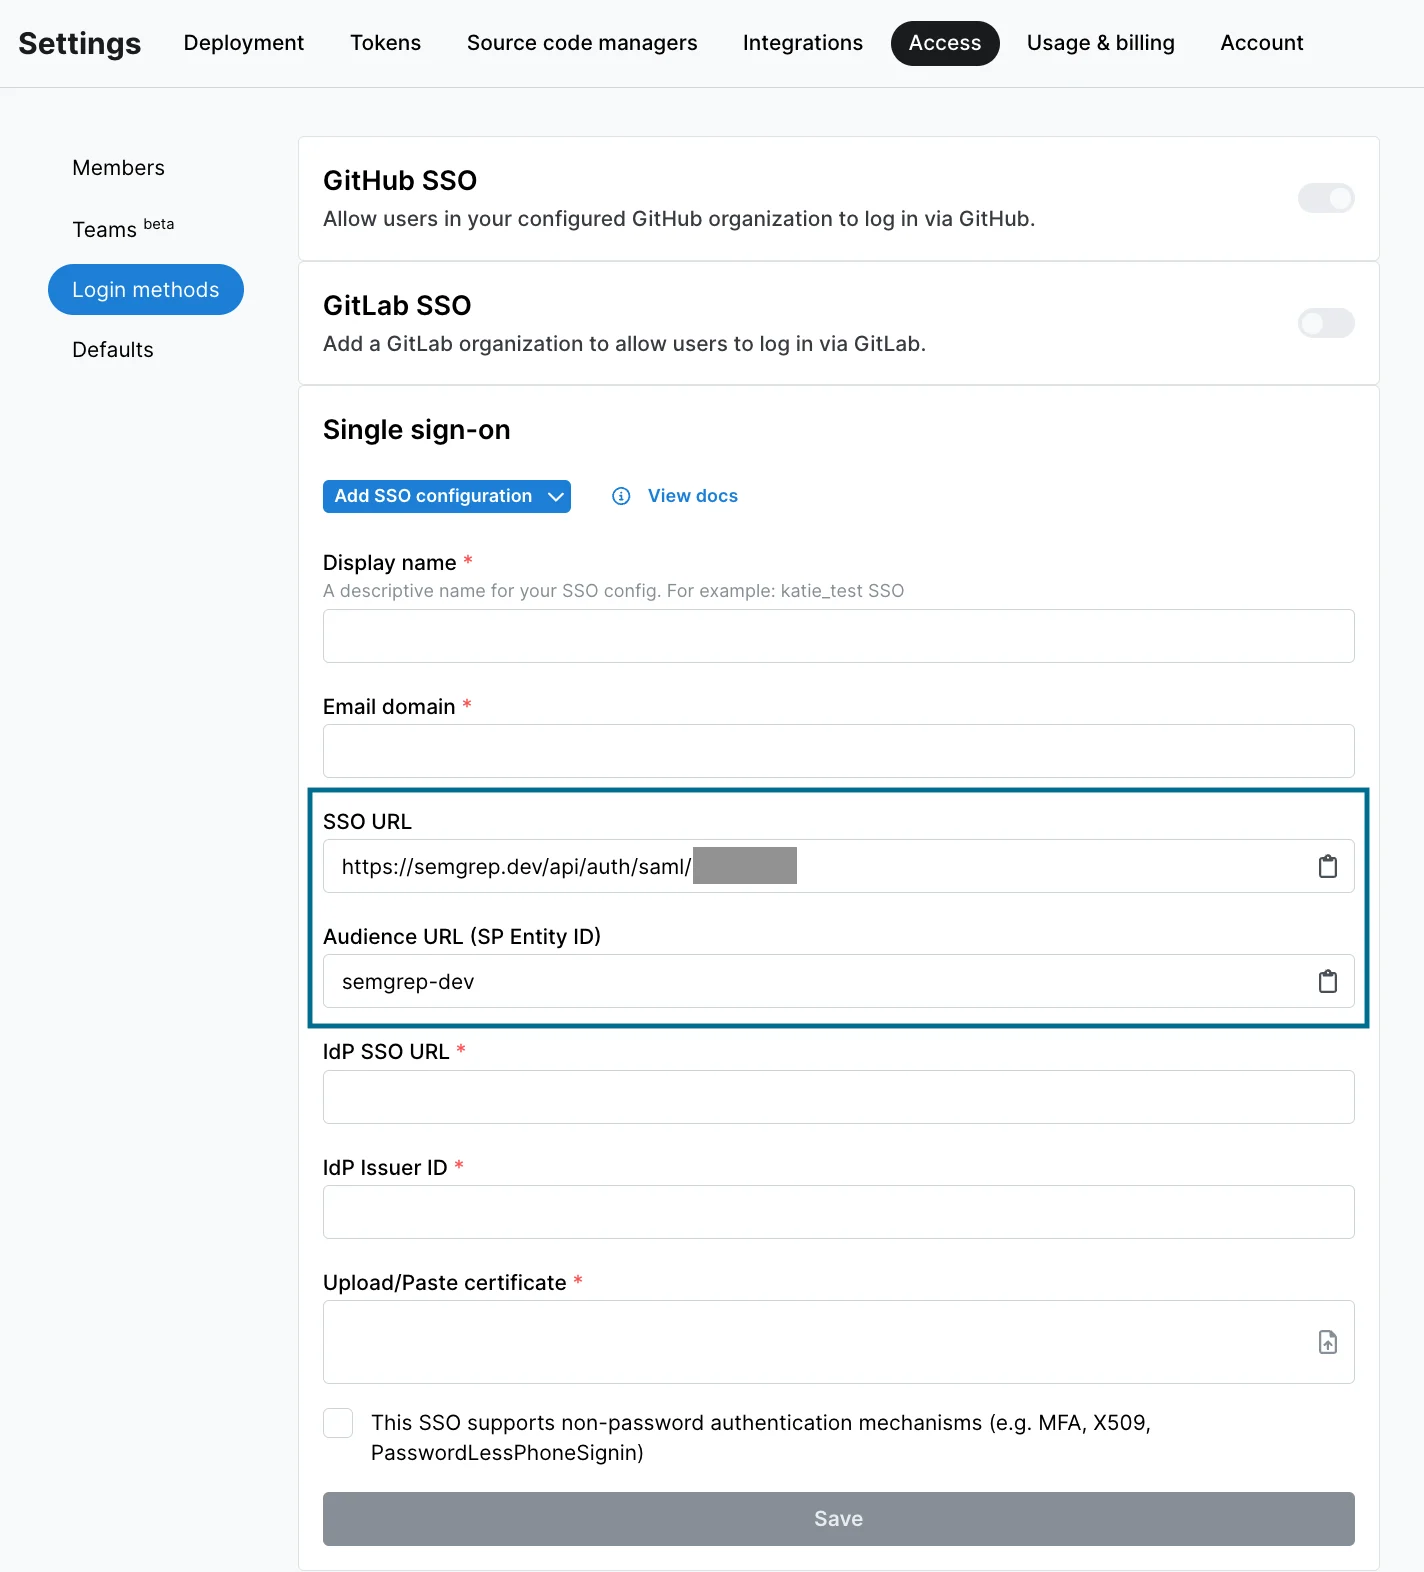
Copy the **SSO URL** and **Audience URL (SP Entity ID)**, and provide it to your authentication provider.
Sign in to Semgrep AppSec Platform.
Navigate to **[Settings > Access > Login methods](https://semgrep.dev/orgs/-/settings/access/loginMethods)**.
Click **Add SSO configuration** and select **SAML2 SSO**.
Provide a **Display name** and the **Email domain**.
Copy the **SSO URL** and **Audience URL (SP Entity ID)**, and provide it to your authentication provider.
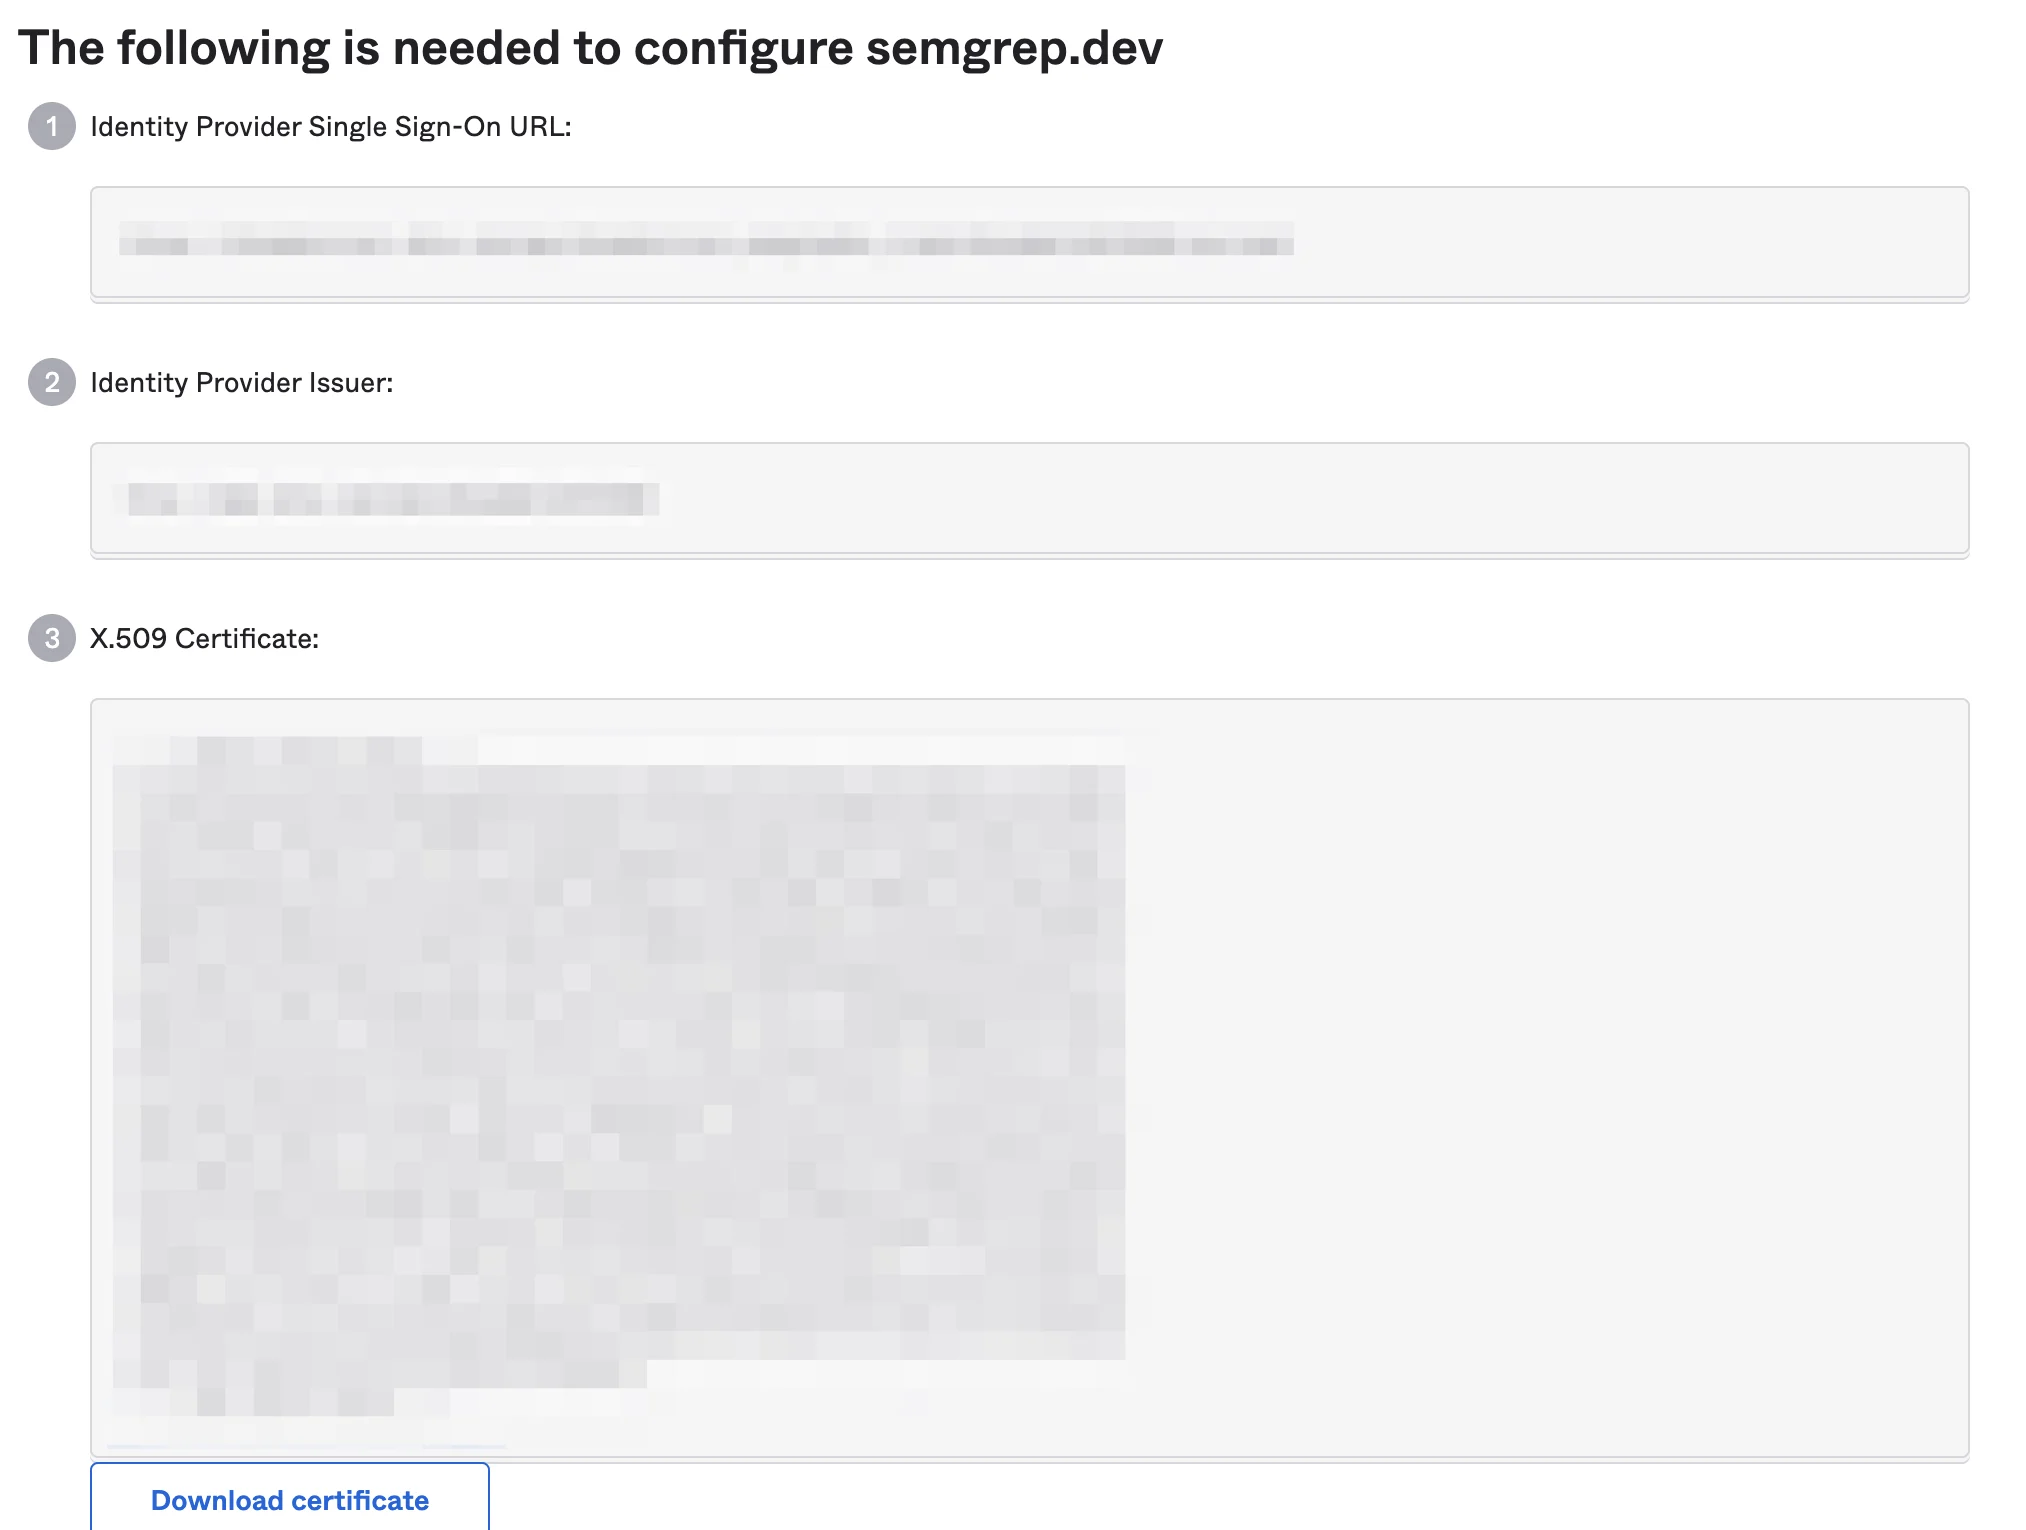
 From your authentication provider, copy your **IdP SSO URL** and **IdP Issuer ID** values, and download the **X509 Certificate**.
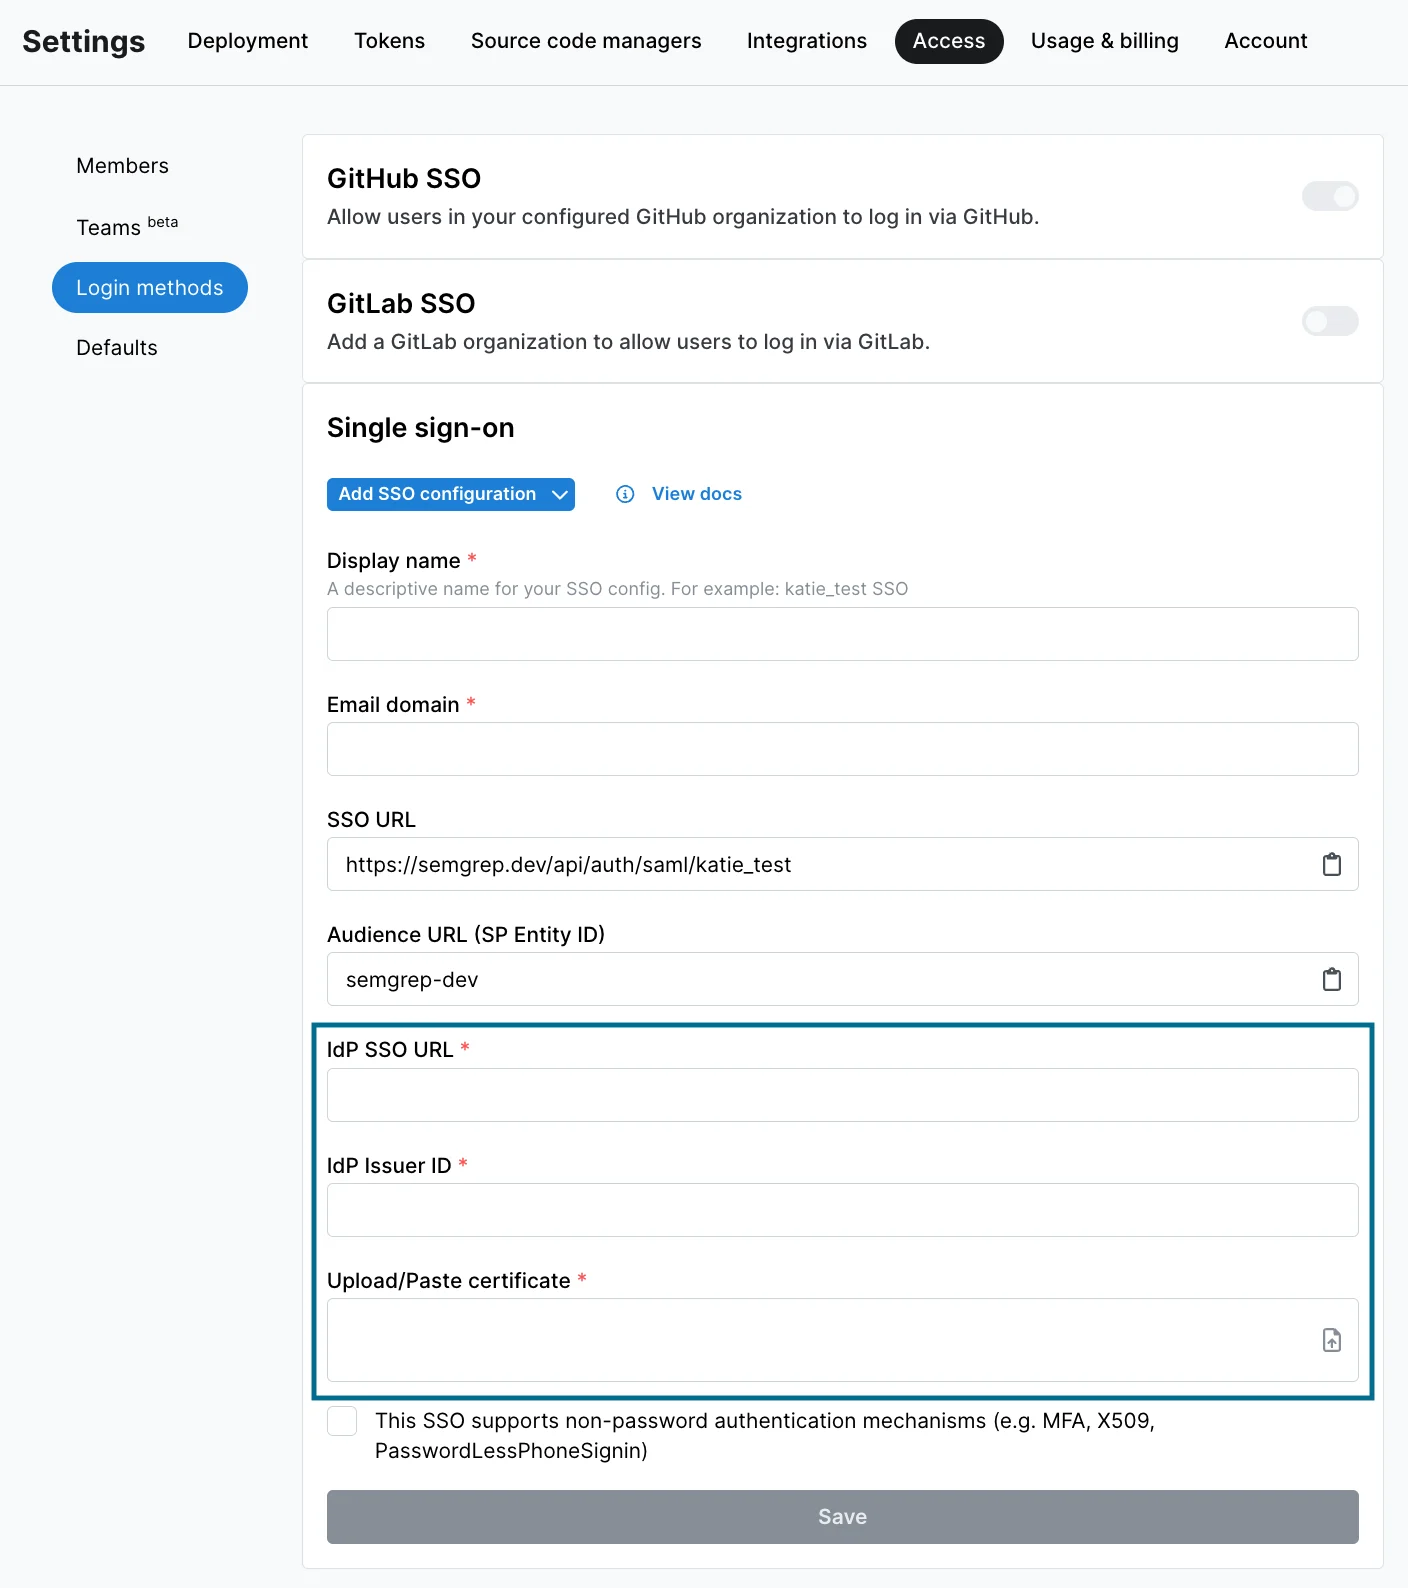
 Return to Semgrep AppSec Platform, and paste the **IdP SSO URL** and **IdP Issuer ID** values, and upload your **X509 Certificate**.
 Select the box next to **This SSO supports non-password authentication mechanisms (e.g. MFA, X509, PasswordLessPhoneSignin)** if applicable.
Click **Save** to proceed.
If you encounter issues during the setup process, [reach out to support](/support) for assistance.
**ADMIN AND ORG OWNER ACCOUNTS**
By default, Semgrep creates new SSO accounts with the **Member** role assigned. You can change the default role assigned to a new user by going to [Settings > Access](https://semgrep.dev/orgs/-/settings/access/defaults).
If you're an admin setting up SSO, and Semgrep creates an SSO account for you with the role of **Member**, you can elevate the permissions granted to your SSO account. To do so, log in to Semgrep with your admin account using the original login method, then [change the role](https://semgrep.dev/orgs/-/settings/access/members) of your newly created SSO account to **Admin**.
### Turn off sign in with GitHub / GitLab
If you have SSO enabled, you can turn off login using GitHub or GitLab credentials. Doing so forces members of your organization to log in using an email address with an approved domain.
Sign in to your [Semgrep account](https://semgrep.dev/login).
Navigate to [**Settings > Access > Login methods**](https://semgrep.dev/orgs/docs-test/settings/access/loginMethods).
GitHub users: Click the **GitHub SSO** toggle to turn off logins using GitHub.
GitLab users: Click the **GitLab SSO** toggle to turn off logins using GitLab.
**WARNING**
Ensure that you have at least one user who can log in as an admin through SSO before disabling sign in with GitHub or GitLab.
### See also
Select the box next to **This SSO supports non-password authentication mechanisms (e.g. MFA, X509, PasswordLessPhoneSignin)** if applicable.
Click **Save** to proceed.
If you encounter issues during the setup process, [reach out to support](/support) for assistance.
**ADMIN AND ORG OWNER ACCOUNTS**
By default, Semgrep creates new SSO accounts with the **Member** role assigned. You can change the default role assigned to a new user by going to [Settings > Access](https://semgrep.dev/orgs/-/settings/access/defaults).
If you're an admin setting up SSO, and Semgrep creates an SSO account for you with the role of **Member**, you can elevate the permissions granted to your SSO account. To do so, log in to Semgrep with your admin account using the original login method, then [change the role](https://semgrep.dev/orgs/-/settings/access/members) of your newly created SSO account to **Admin**.
### Turn off sign in with GitHub / GitLab
If you have SSO enabled, you can turn off login using GitHub or GitLab credentials. Doing so forces members of your organization to log in using an email address with an approved domain.
Sign in to your [Semgrep account](https://semgrep.dev/login).
Navigate to [**Settings > Access > Login methods**](https://semgrep.dev/orgs/docs-test/settings/access/loginMethods).
GitHub users: Click the **GitHub SSO** toggle to turn off logins using GitHub.
GitLab users: Click the **GitLab SSO** toggle to turn off logins using GitLab.
**WARNING**
Ensure that you have at least one user who can log in as an admin through SSO before disabling sign in with GitHub or GitLab.
### See also