> ## Documentation Index
> Fetch the complete documentation index at: https://docs.semgrep.dev/llms.txt
> Use this file to discover all available pages before exploring further.
# SAML SSO with Microsoft Entra ID
This article describes how to set up SAML Single Sign-on for Semgrep AppSec Platform with Microsoft Entra ID.
This article describes how to set up SAML Single Sign-on for Semgrep AppSec Platform with Microsoft Entra ID.
**PREREQUISITES**
* An existing Microsoft Entra ID account.
* Sufficient permissions within Microsoft Entra ID to create enterprise apps. See [Microsoft Entra ID roles](https://learn.microsoft.com/en-us/azure/active-directory/roles/permissions-reference).
* Admin privileges for your Semgrep deployment.
Setting up SAML SSO using Microsoft Entra ID consists of the following general steps:
Create a custom **enterprise app** within Microsoft Entra ID.
Set up SAML SSO for your new enterprise app.
Configure Semgrep.
Add users to your new enterprise app.
## Configure SSO
Sign in to [ Semgrep AppSec Platform](https://semgrep.dev/login).
Go to [**Settings > Access > Login methods**](https://semgrep.dev/orgs/-/settings/access/loginMethods).
In the **Single sign-on (SSO)** section, provide a valid **Email domain**, then click **Initialize**.
The **Configure Single Sign-On** dialog appears to guide you through the remaining configuration steps. Begin by selecting **Entra ID (Azure AD) SAML**.
Follow the instructions provided on the subsequent **Configure Single Sign-On** dialog pages to complete this process. When you've completed the required steps, use **Test sign-in** to test the connection.
Once test sign-in has passed, close the test page. Verify that the **Connection details** shown on the **Connection activated** screen are correct and close the dialog.
Verify that the **Connection status** is now **active** under the **Single sign-on (SSO)** section in Semgrep AppSec Platform.
To use the new connection, log out of Semgrep, then log back in using SSO.
## Create a custom enterprise app
Sign in to the [Microsoft Entra admin center](https://entra.microsoft.com/).
Use the search bar to find and navigate to **enterprise applications**.
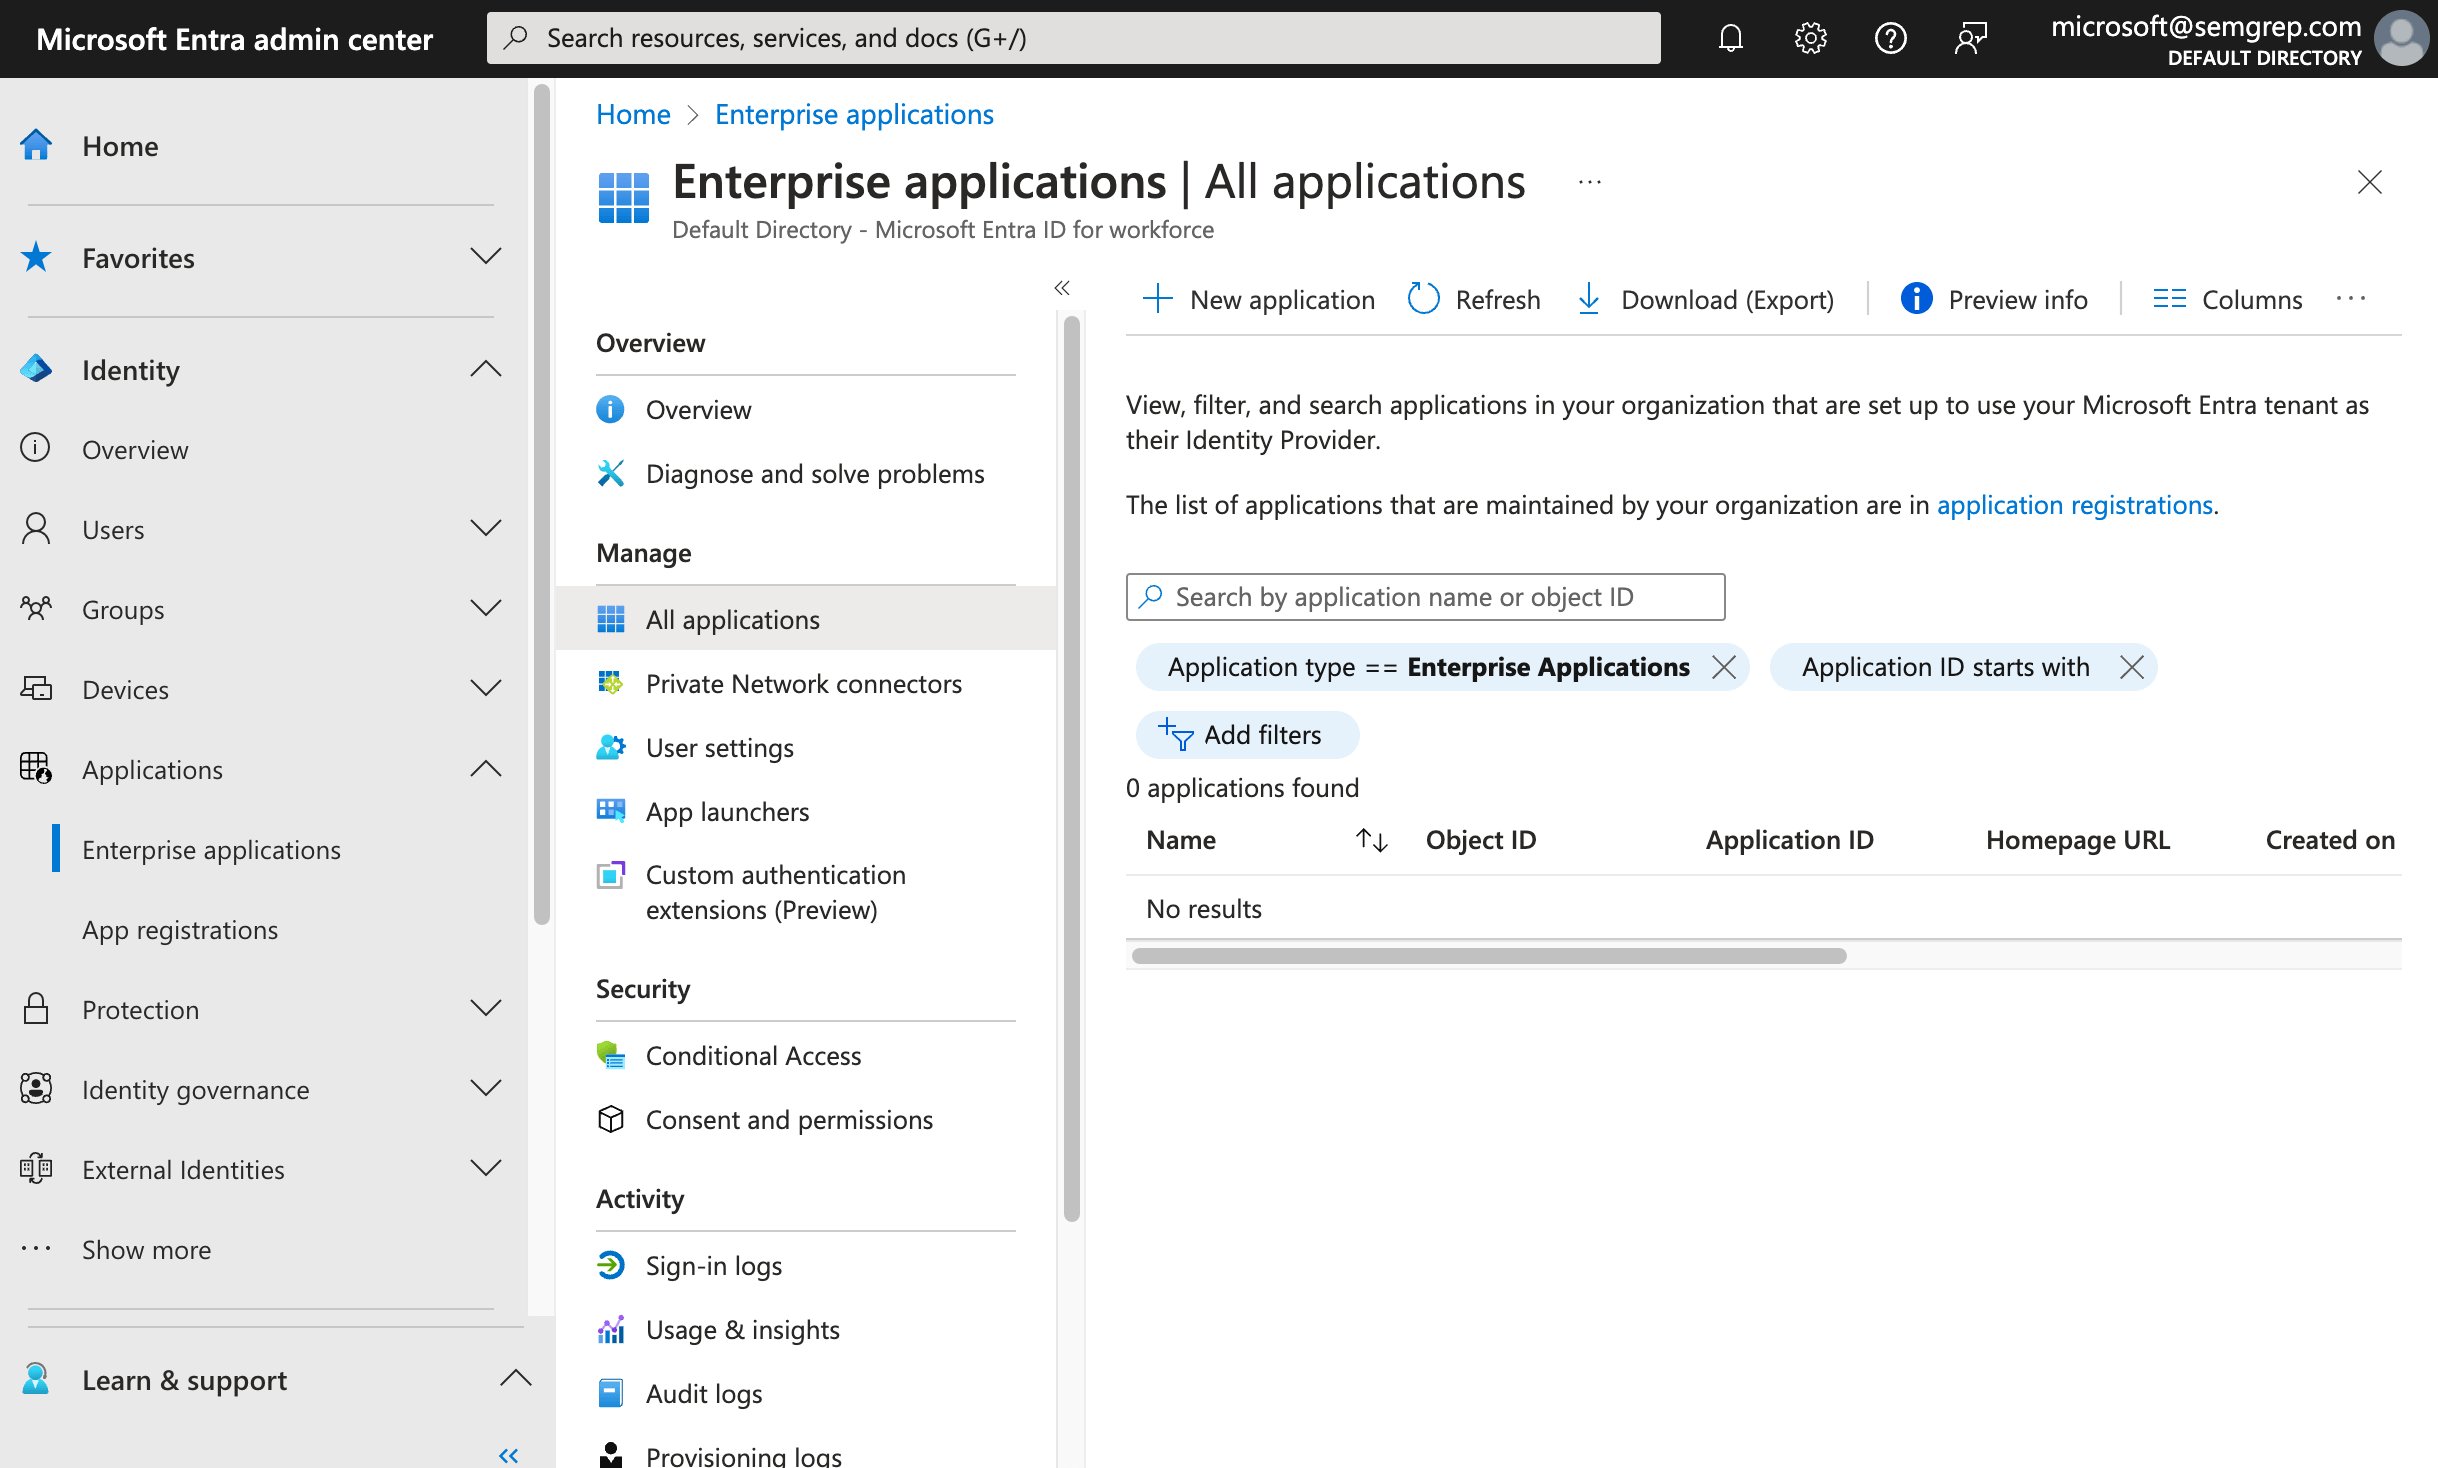 Click **New application** > **Create your own application**. A menu appears.
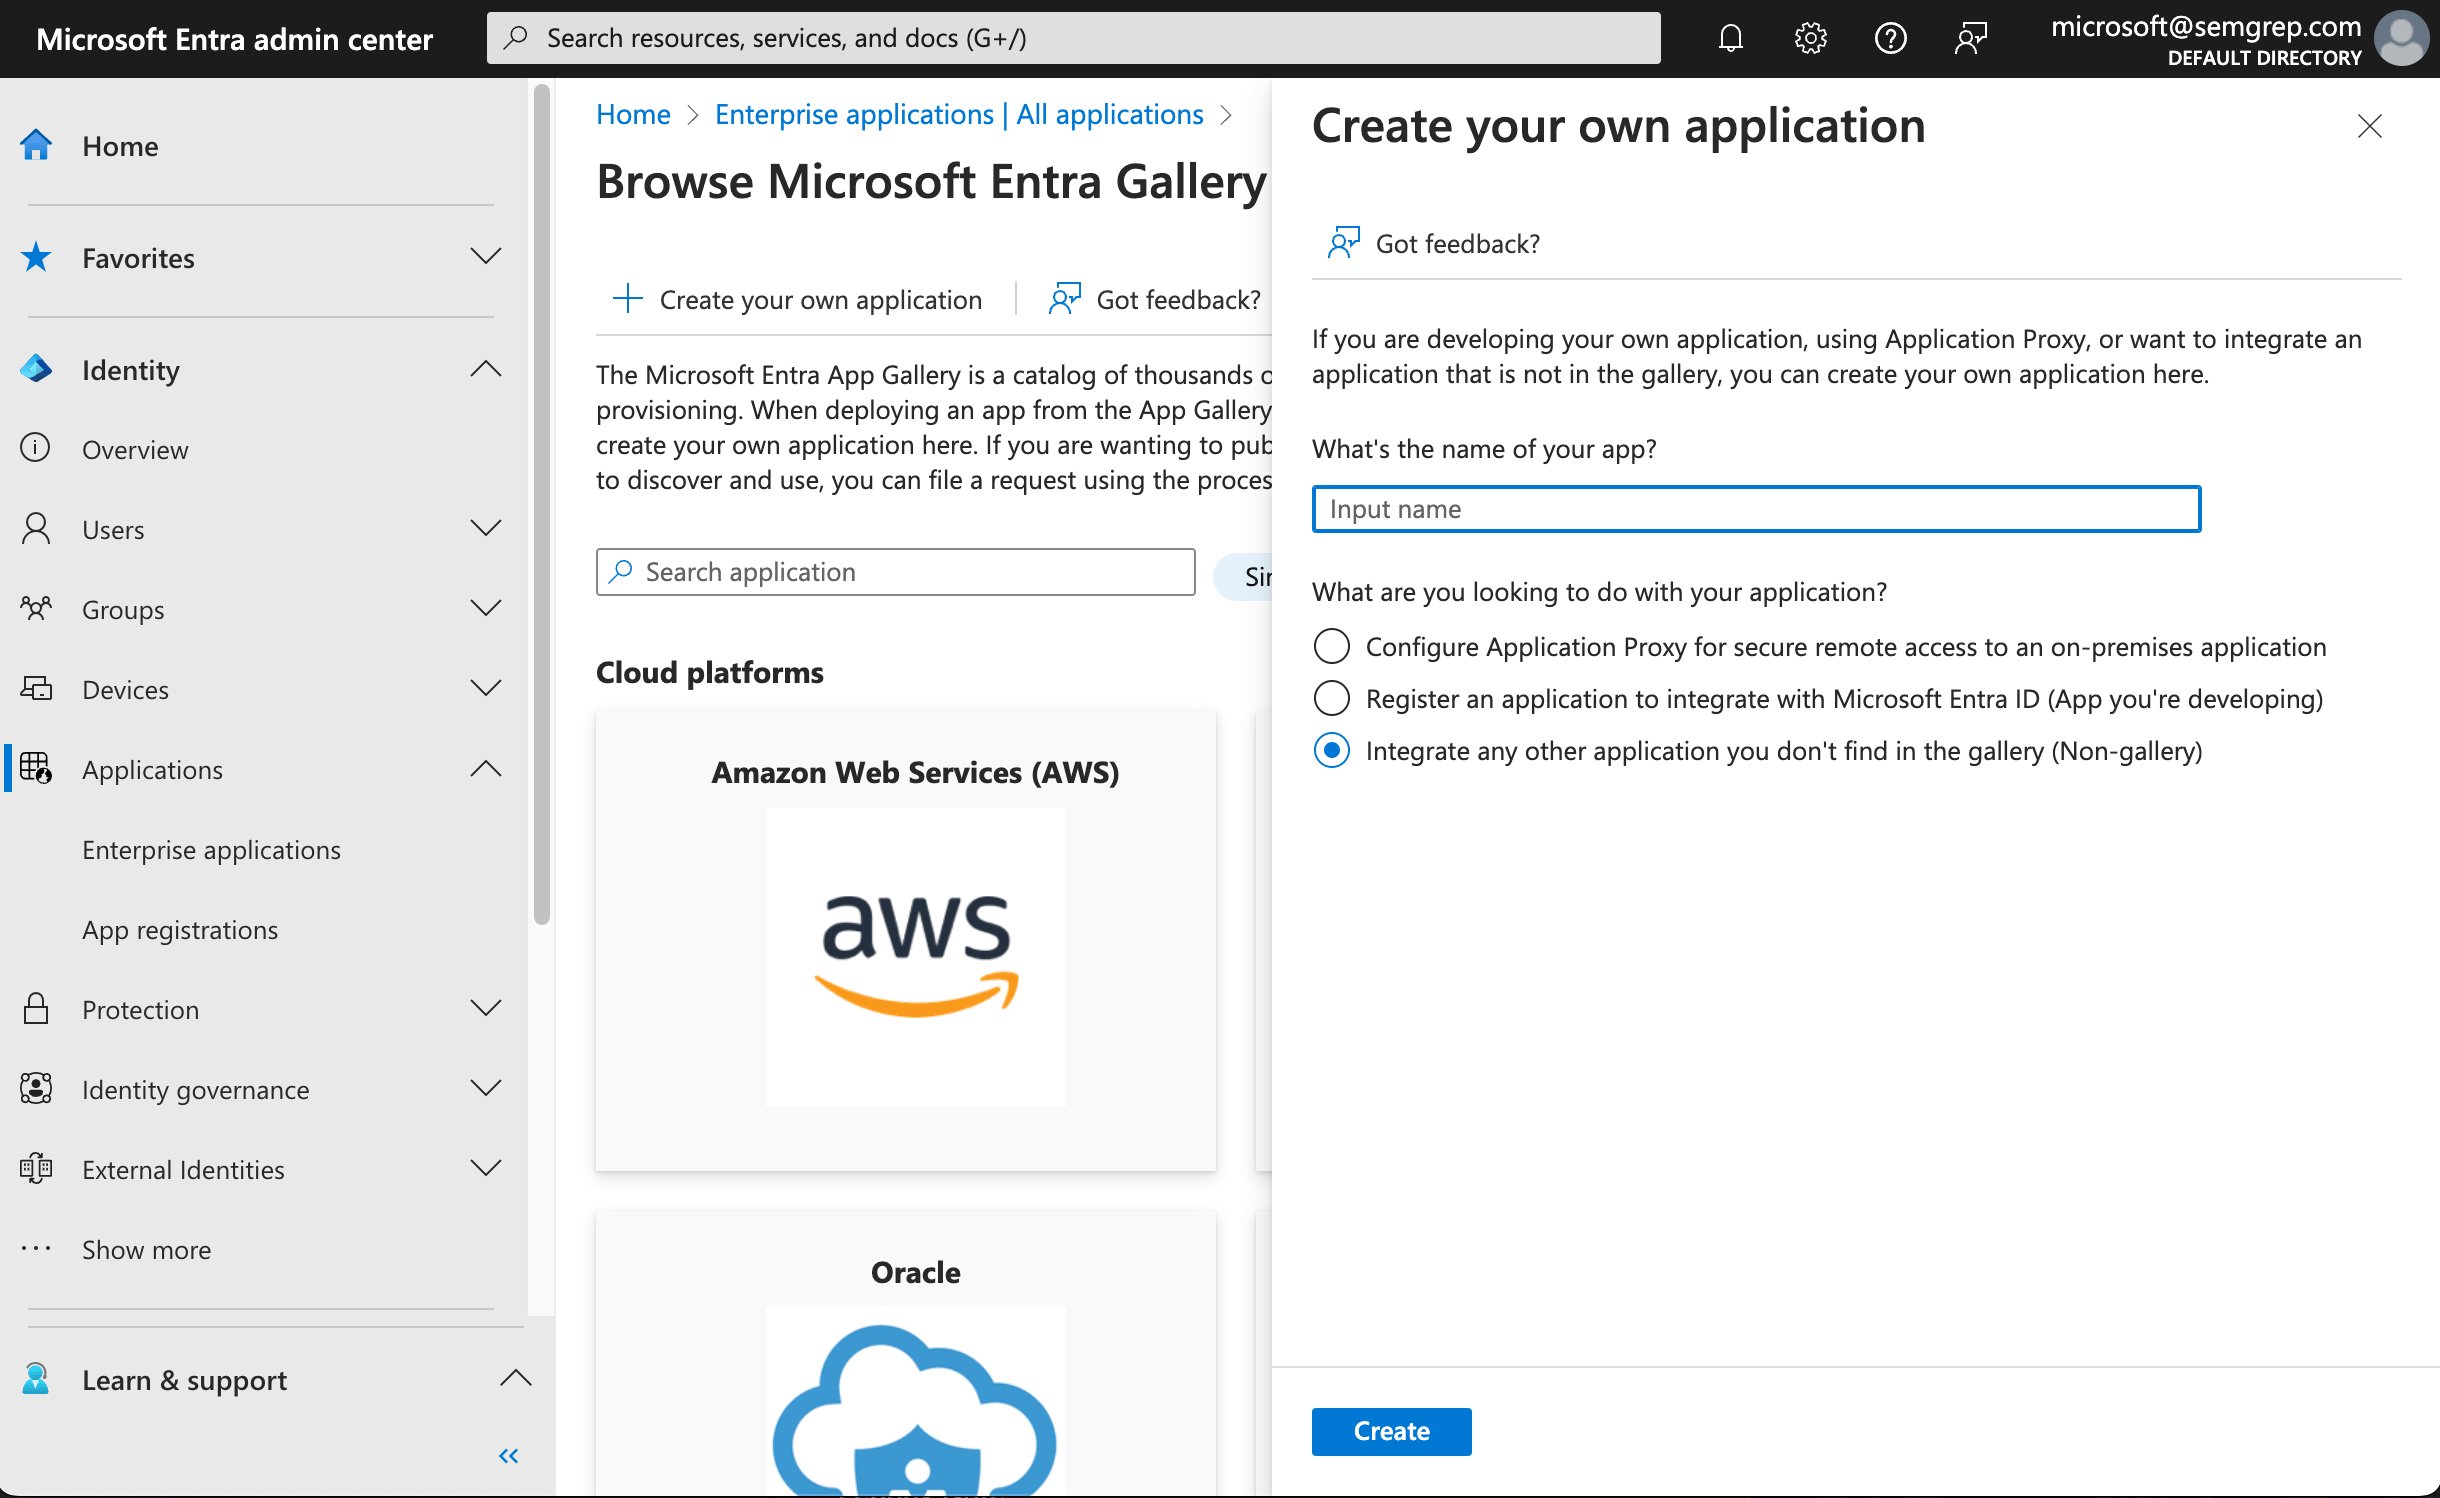 Name your new application something like `Semgrep SAML`.
Select **Integrate any other application you don't find in the gallery (non-gallery)**.
Click **Create**. This takes you to your new enterprise application's page.
You have now created a custom enterprise app for Semgrep to integrate with Microsoft Entra ID. This enables you to set up SAML SSO.
## Set up SAML SSO for your new enterprise app
From your new enterprise app's page, go to **Single-sign on** > **SAML**.
Name your new application something like `Semgrep SAML`.
Select **Integrate any other application you don't find in the gallery (non-gallery)**.
Click **Create**. This takes you to your new enterprise application's page.
You have now created a custom enterprise app for Semgrep to integrate with Microsoft Entra ID. This enables you to set up SAML SSO.
## Set up SAML SSO for your new enterprise app
From your new enterprise app's page, go to **Single-sign on** > **SAML**.
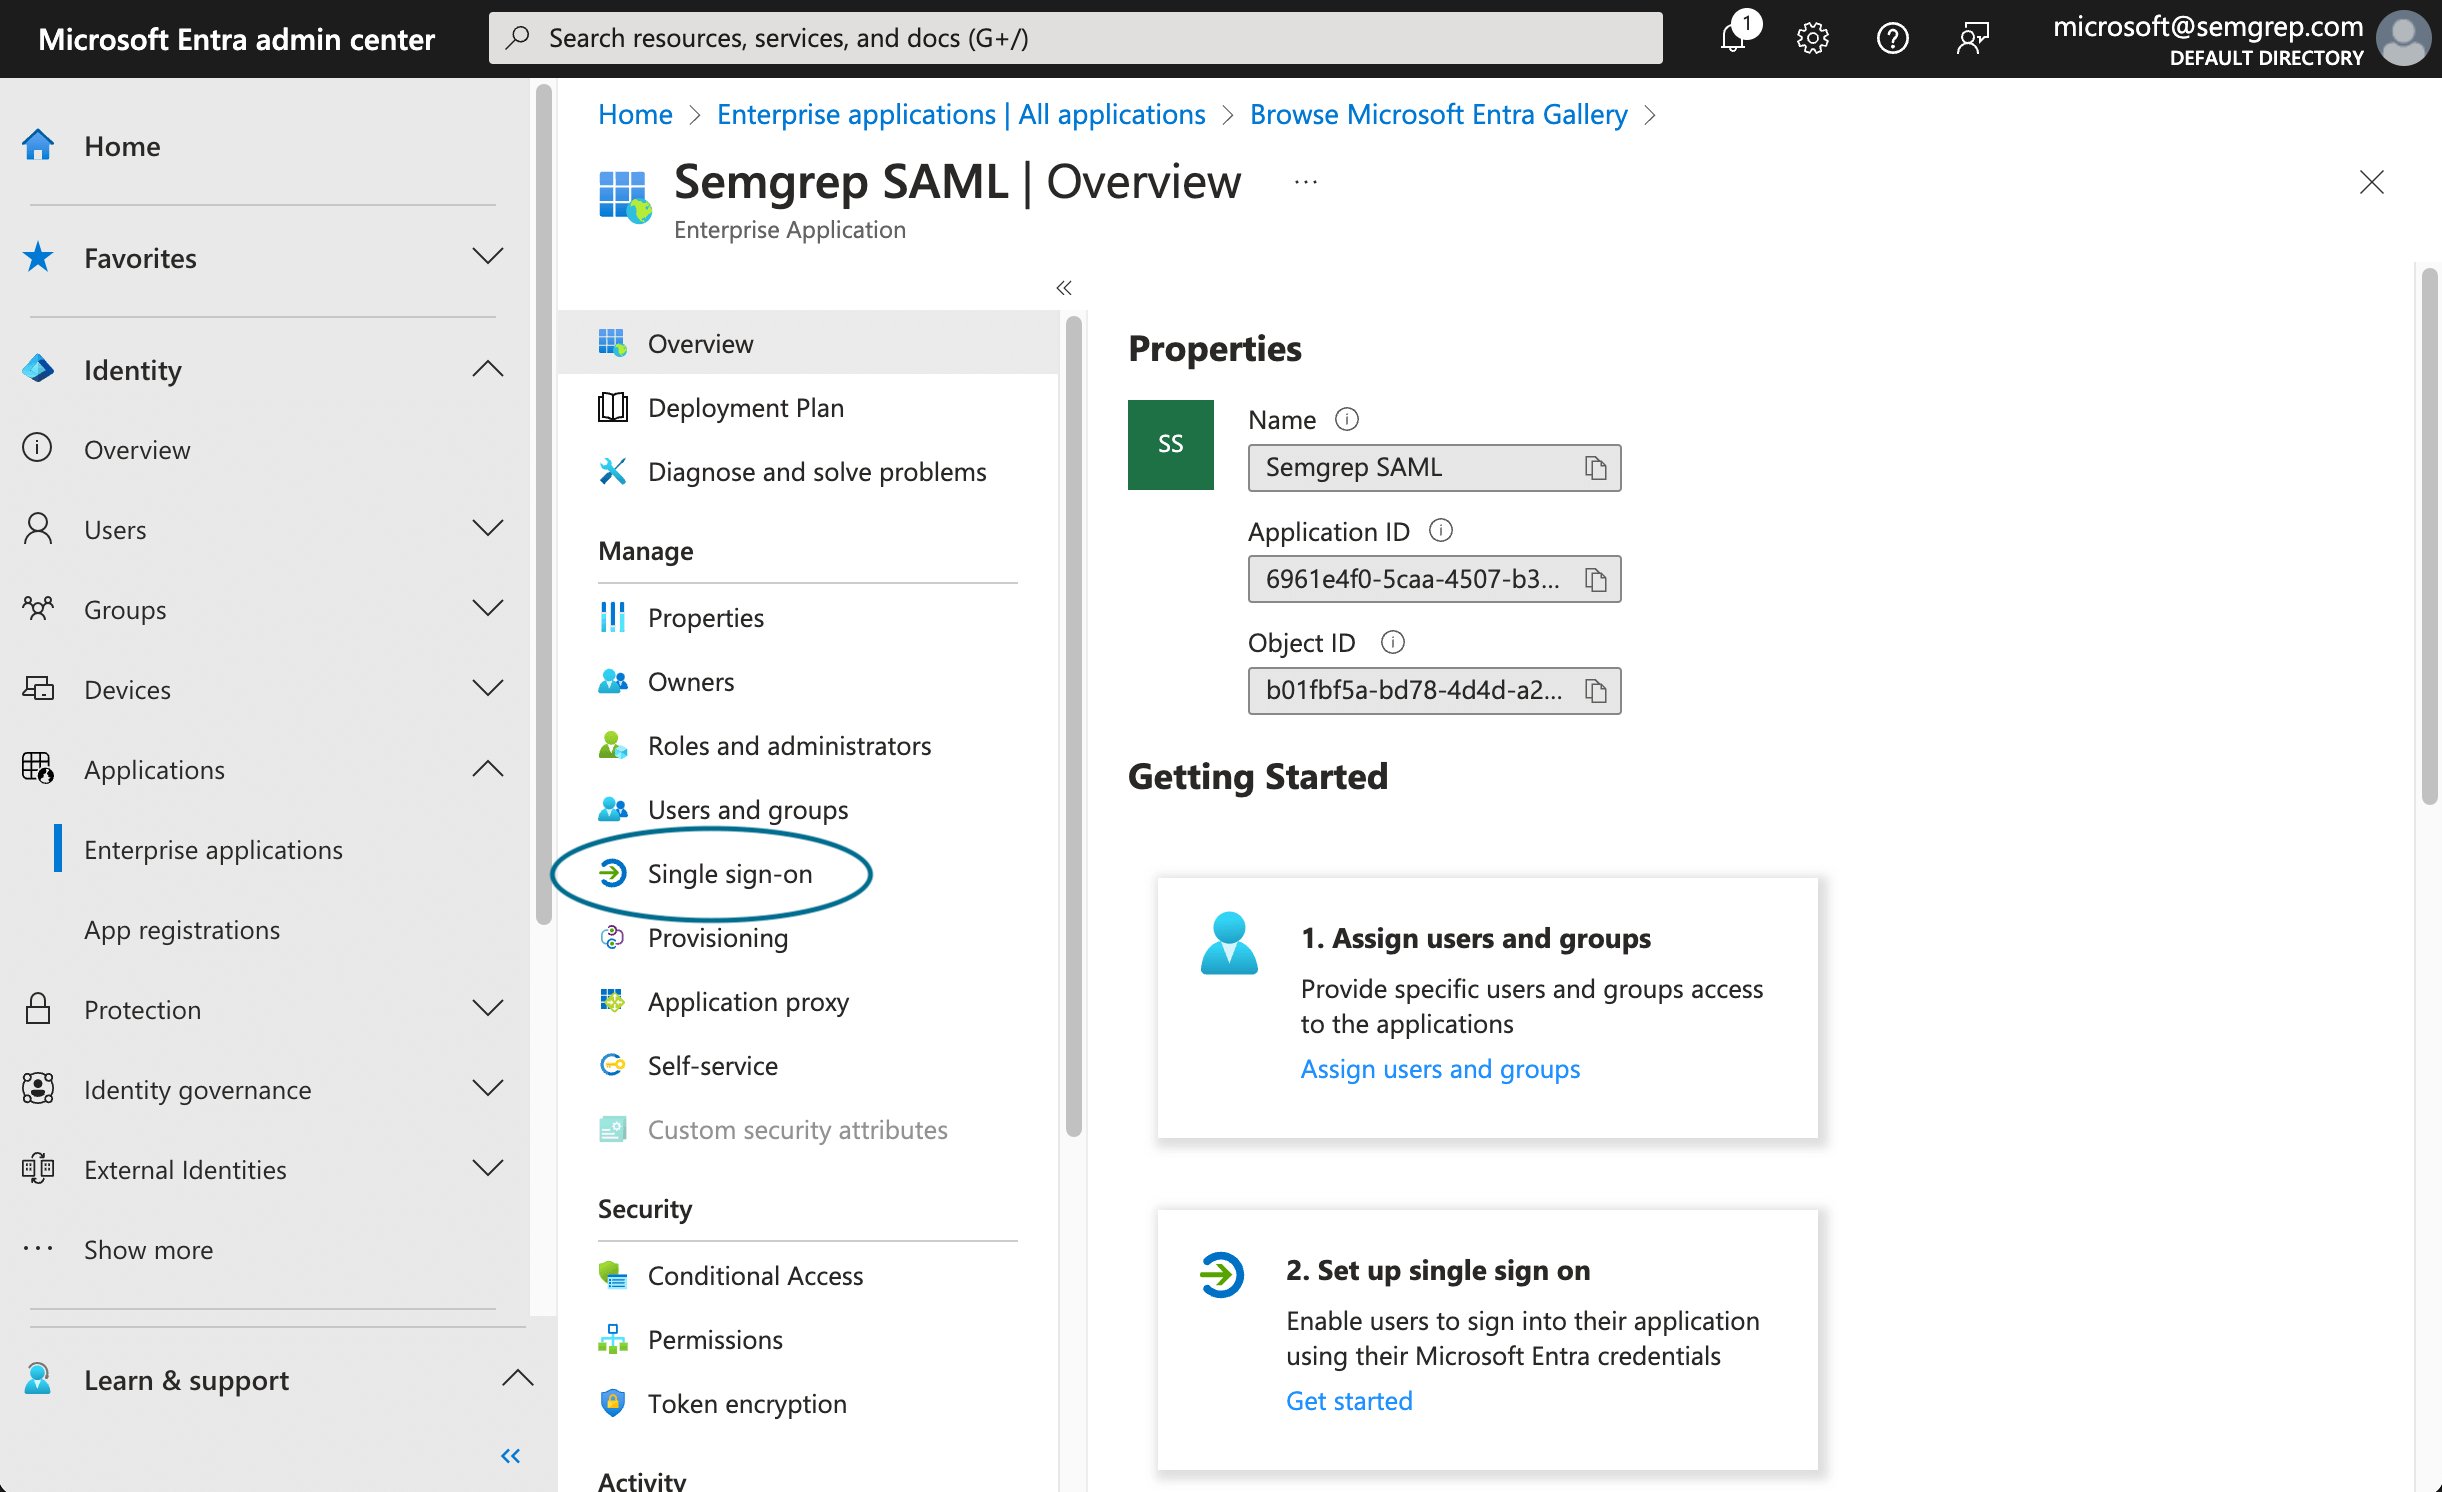 When prompted to **Select a single sign-on method**, select **SAML**. You are redirected to the **SAML-based Sign-on** page.
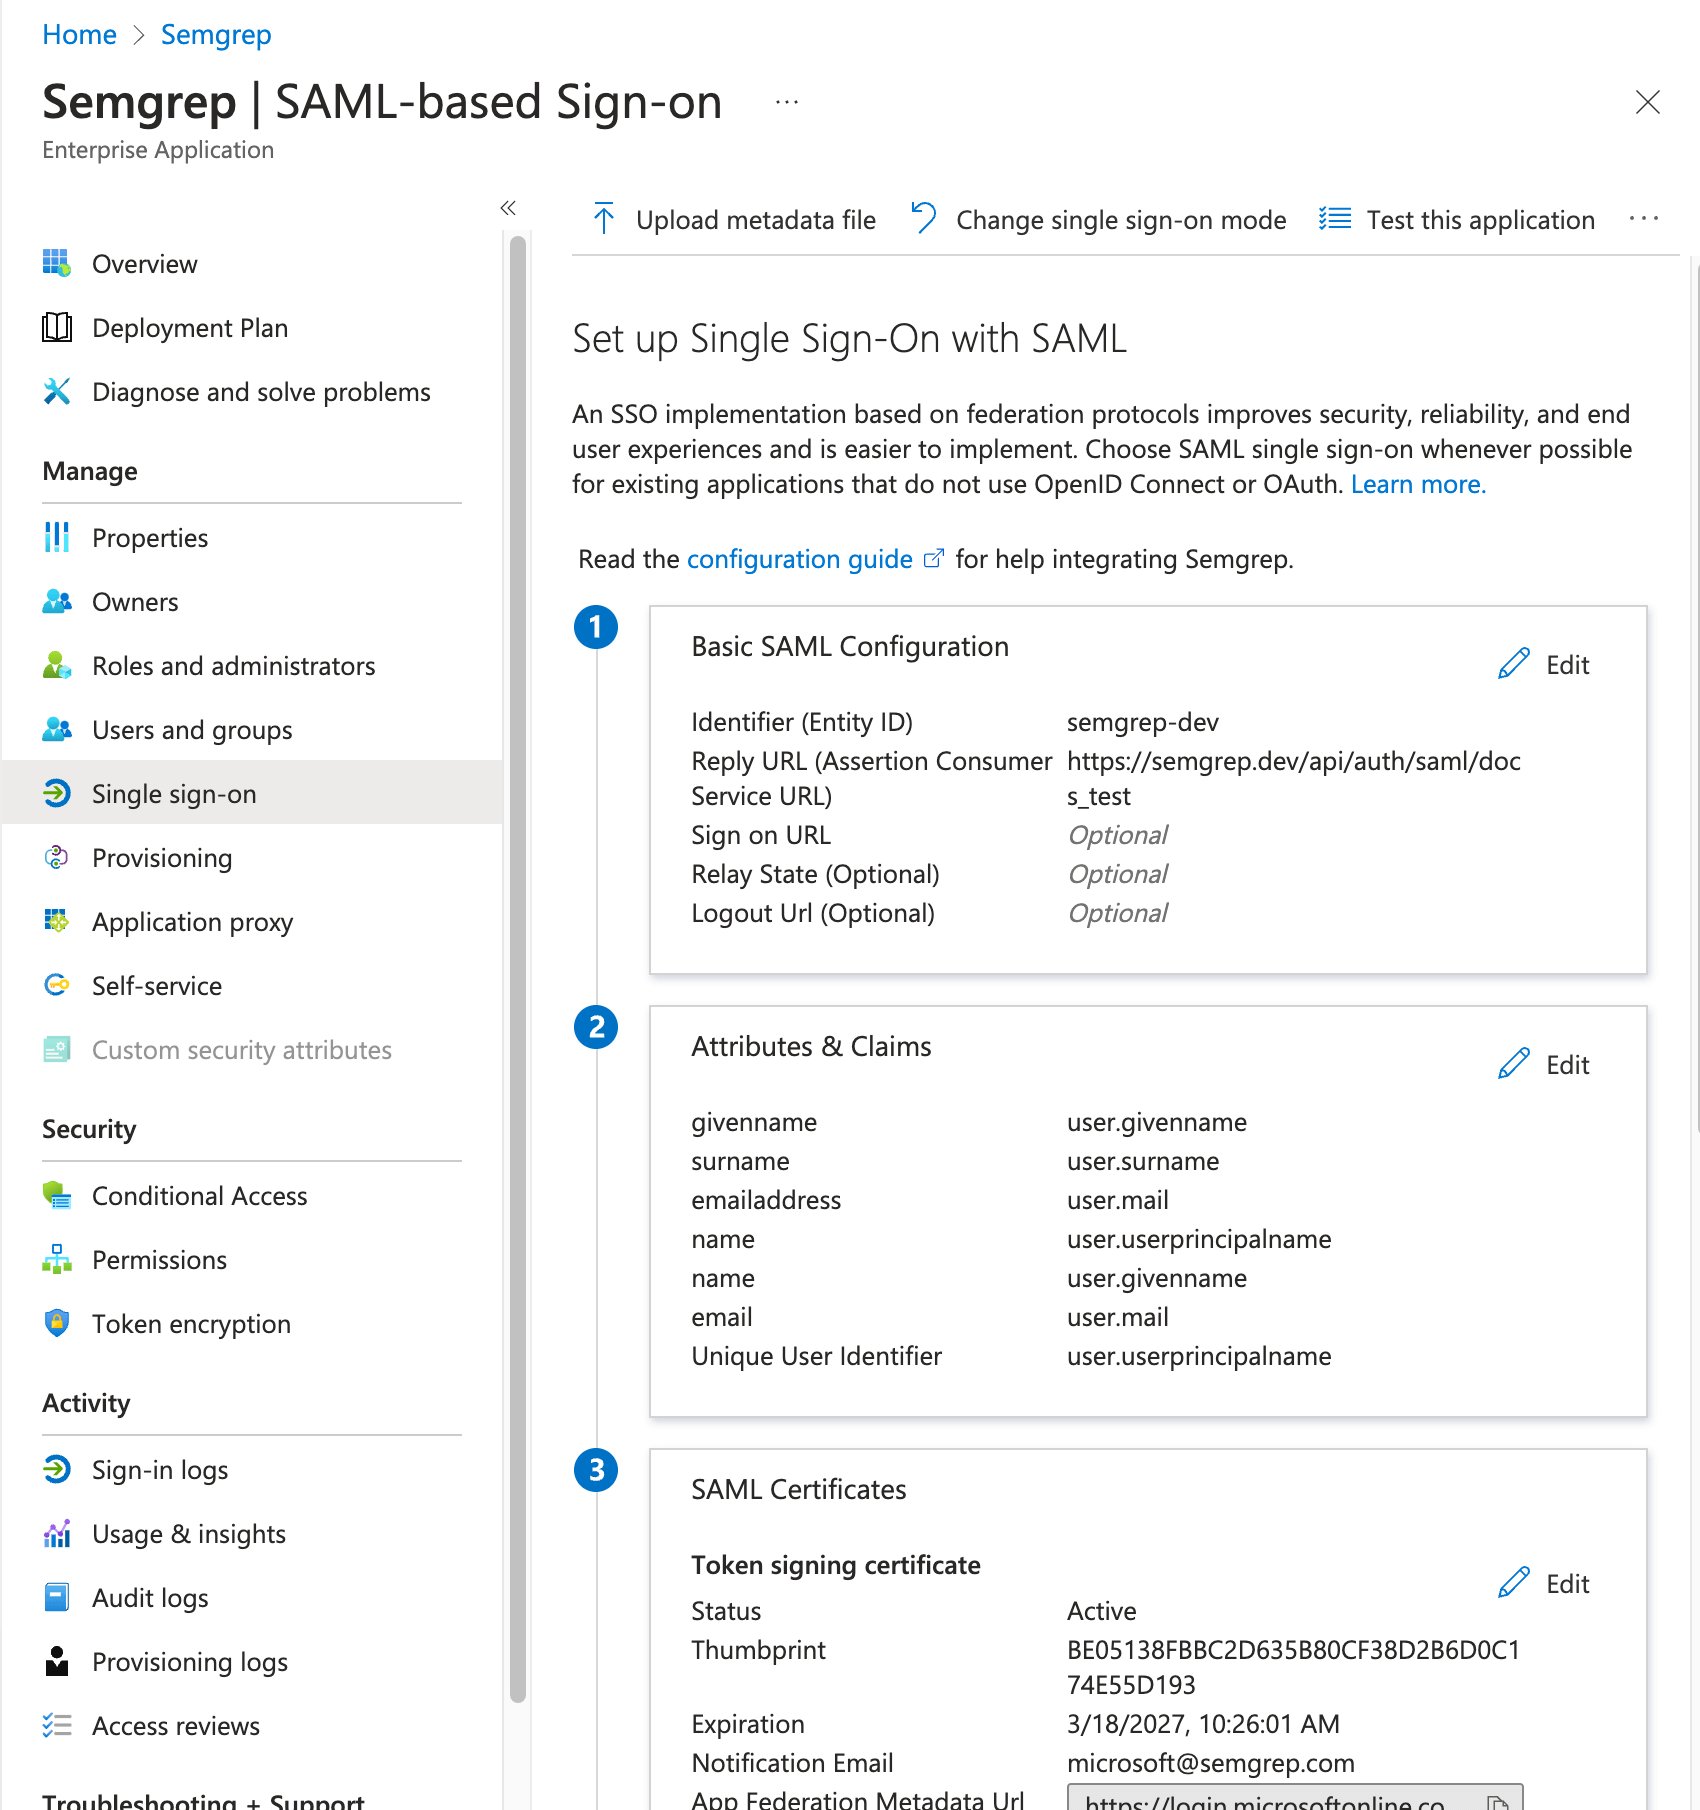
In the **Basic SAML Configuration** section, click **Edit**. Provide the **Entity ID** and **Reply URL**. You can retrieve these values from Semgrep AppSec Platform by performing the following steps:
When prompted to **Select a single sign-on method**, select **SAML**. You are redirected to the **SAML-based Sign-on** page.
In the **Basic SAML Configuration** section, click **Edit**. Provide the **Entity ID** and **Reply URL**. You can retrieve these values from Semgrep AppSec Platform by performing the following steps:
i. Sign in to Semgrep AppSec Platform.
ii. Navigate to **[Settings > Access > Login methods](https://semgrep.dev/orgs/-/settings/access/loginMethods)**.
iii. Click **Add SSO configuration** and select **SAML2 SSO**.
iv. Copy the **Audience URL (SP Entity ID)** value from Semgrep AppSec Platform. Return to **Basic SAML Configuration**. Click **Add identifier** to paste this value as the **Identifier (Entity ID)**.
v. Copy the **SSO URL** value from Semgrep AppSec Platform. Return to **Basic SAML Configuration**. Click **Add reply URL** to paste this value as the **Reply URL (Assertion Consumer Service URL)**.
Click **Save** and close out of **Basic SAML Configuration**.
In the **Attributes and Claims** section, click **Edit**. You must add two claims. To add your first claim:
i. Click **Add new claim**.
ii. Enter `name` in the **Name** field.
iii. For the **Source attribute** drop-down box, select `user.displayname`.
iv. Click **Save**.
To add your second claim:
i. Click **Add new claim**
ii. Enter `email` in the **Name** field.
iii. From the **Source attribute** drop-down box, select `user.mail`.
iv. Click **Save**.
Close out of **Attributes & Claims**.
## Configure Semgrep
Navigate to Semgrep AppSec Platform, and provide the values required by the SAML2 form:
i. Provide the **Display name** and the **Email domain** you are using for the integration.
ii. Copy the **Login URL** value from Microsoft Entra ID and paste it in into Semgrep AppSec Platform's **IDP SSO URL** field.
iii. Copy and paste the **Microsoft Entra ID Identifier** value into Semgrep AppSec Platform's **IdP Issuer ID** field.
iv. In Entra ID's **SAML-based Sign-on** page, click **Download** to obtain the **Certificate (Base64)**.
v. In Semgrep AppSec Platform, under **Upload/Paste certificate**, click **Browse** and then select the certificate you downloaded.
 Select the box next to **This SSO supports non-password authentication mechanisms (e.g. MFA, X509, PasswordLessPhoneSignin)** if applicable.
Click **Save** to proceed.
## Add users to your new enterprise app
To add users to the application in so they can log in with their domain emails, refer to [Assign users and groups to an application](https://learn.microsoft.com/en-us/azure/active-directory/manage-apps/assign-user-or-group-access-portal).
Select the box next to **This SSO supports non-password authentication mechanisms (e.g. MFA, X509, PasswordLessPhoneSignin)** if applicable.
Click **Save** to proceed.
## Add users to your new enterprise app
To add users to the application in so they can log in with their domain emails, refer to [Assign users and groups to an application](https://learn.microsoft.com/en-us/azure/active-directory/manage-apps/assign-user-or-group-access-portal).