YOUR DEPLOYMENT JOURNEY
- You have gained the necessary resource access and permissions required for deployment.
- You have created a Semgrep account and organization.
- You are an admin for both your Semgrep deployment and your IdP provider.
- For GitHub and GitLab users: You have connected your source code manager.
- Guided setup (beta)
- Legacy manual configuration
OpenID Connect / OAuth 2.0
MICROSOFT ENTRA IDSemgrep AppSec Platform does not support using OpenID with Microsoft Entra ID. Follow the instructions to set up SAML SSO with Microsoft Entra ID instead.
1
Sign in to Semgrep AppSec Platform.
3
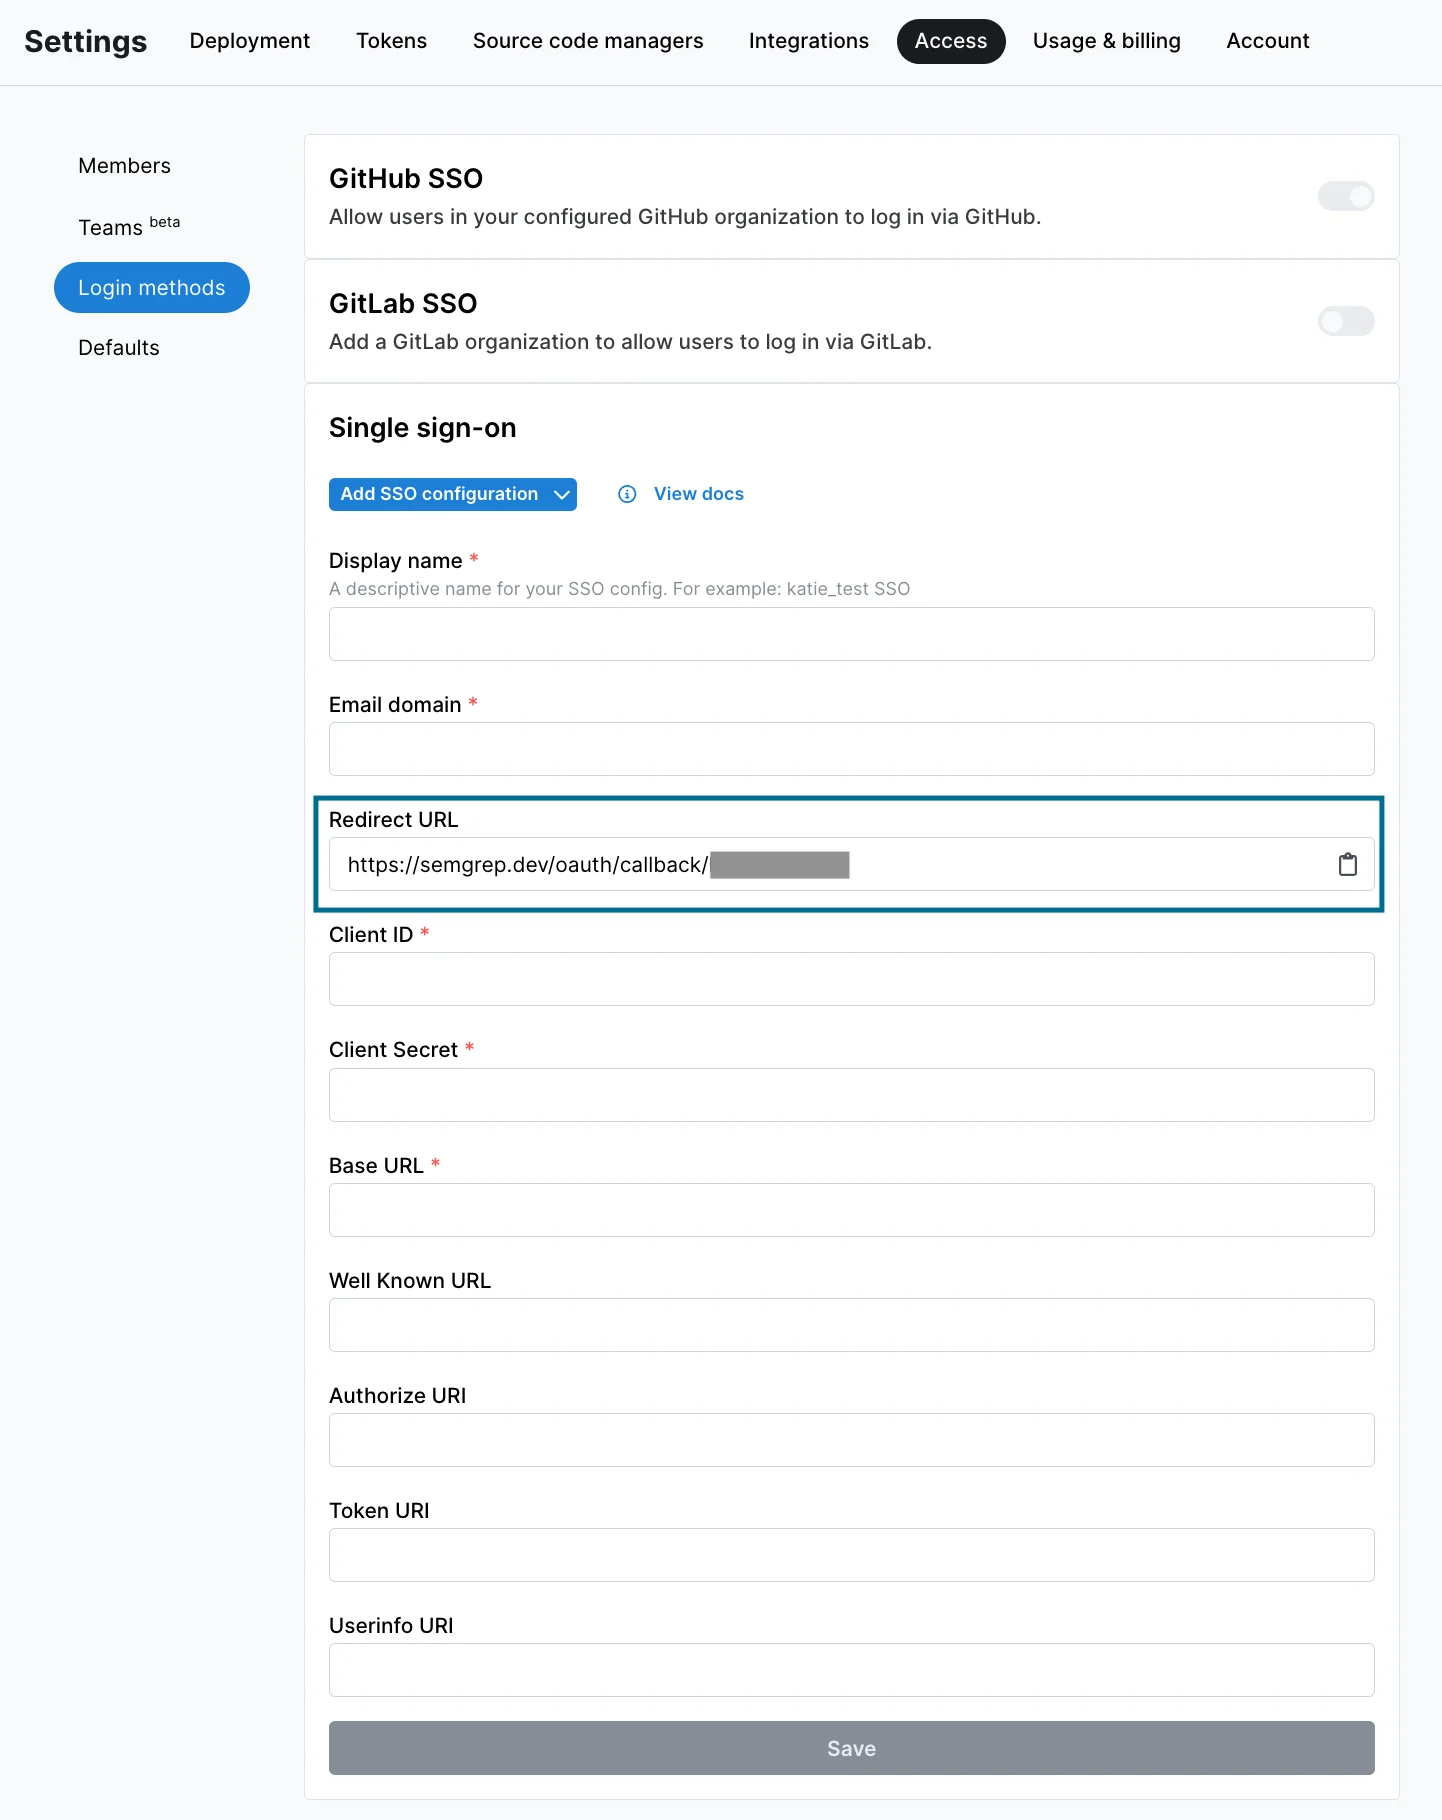
In the Single sign-on (SSO) section, provide a valid Email domain, then click Initialize.
4
The Configure Single Sign-On dialog appears. Begin by selecting your identity provider, or choose Custom OIDC.
5
Follow the instructions provided on the subsequent Configure Single Sign-On dialog pages to complete this process. When you’ve completed the required steps, use Test sign-in to test the connection.
6
Once test sign-in has passed, close the test page. Verify that the Connection details shown on the Connection activated screen are correct and close the dialog.
7
Verify that the Connection status is now active under the Single sign-on (SSO) section in Semgrep AppSec Platform.
8
To use the new connection, log out of Semgrep, then log back in using SSO.
SAML 2.0
GOOGLE WORKSPACE SAMLIf you’re using Google Workspace SAML, see SAML Single Sign-on with Google Workspace for specific guidance.
1
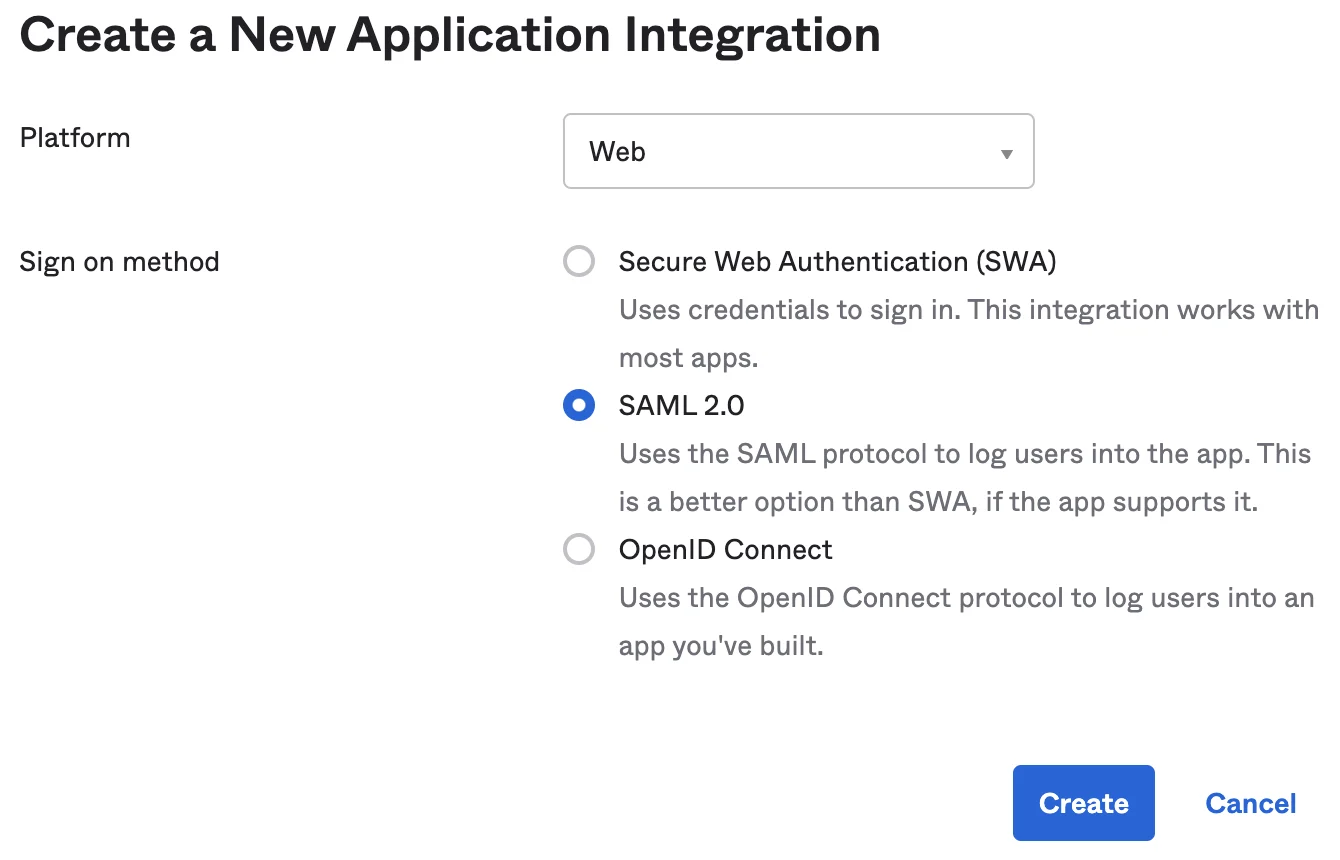
Create a SAML app with your authentication provider.
2
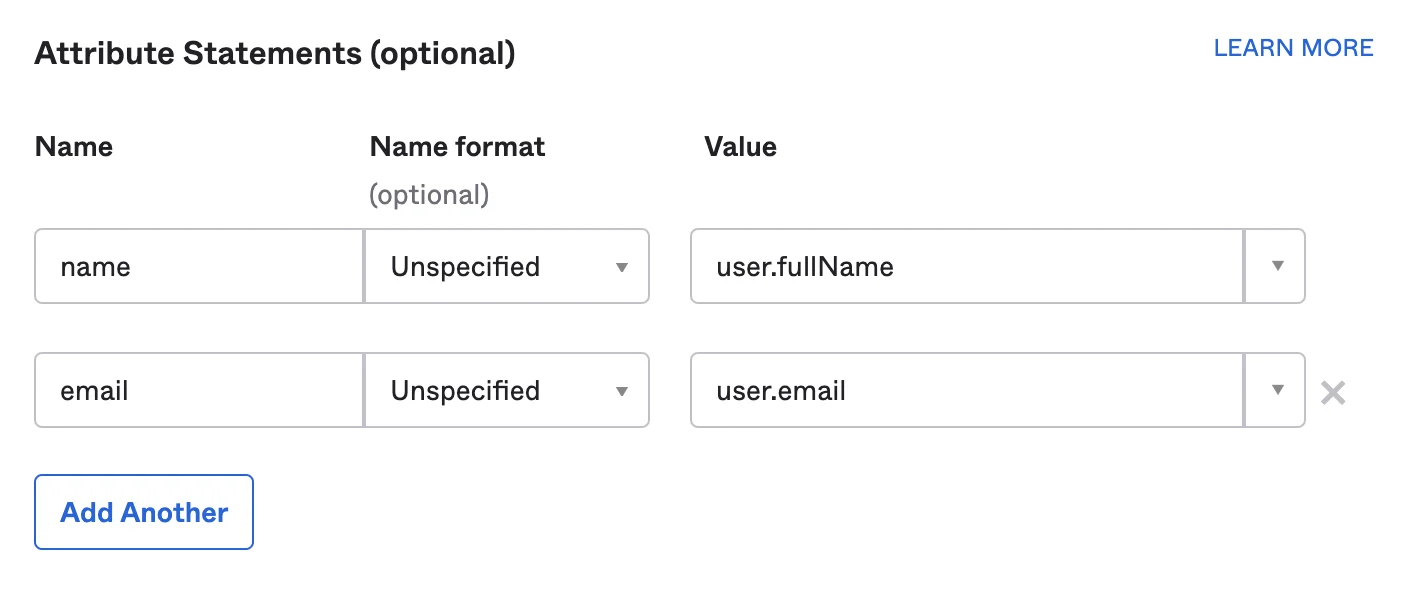
With your authentication provider, add in two attribute statements:
name and email.3
Sign in to Semgrep AppSec Platform.
5
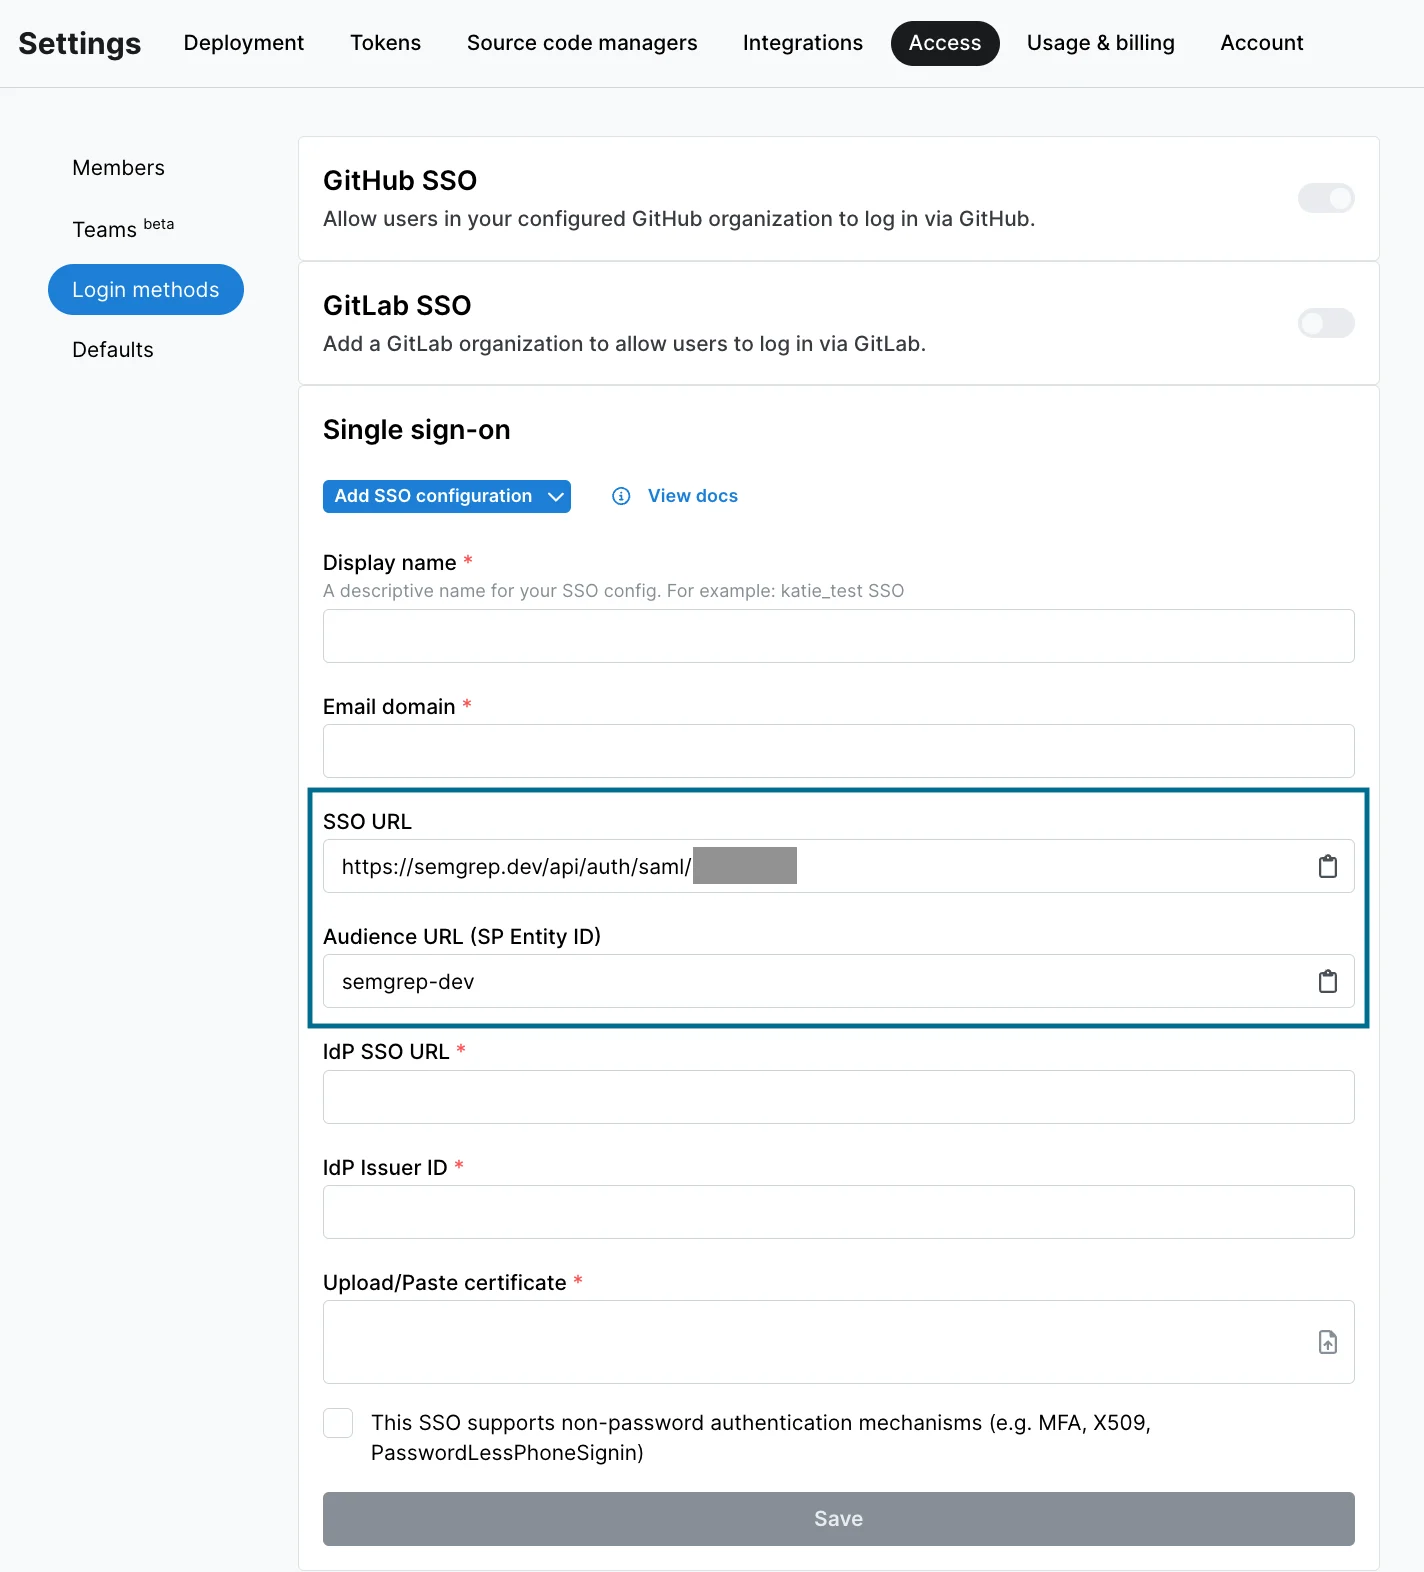
In the Single sign-on (SSO) section, provide a valid Email domain, then click Initialize.
6
The Configure Single Sign-On dialog appears to guide you through the remaining configuration steps. Begin by selecting your identity provider, or choose Custom SAML.
7
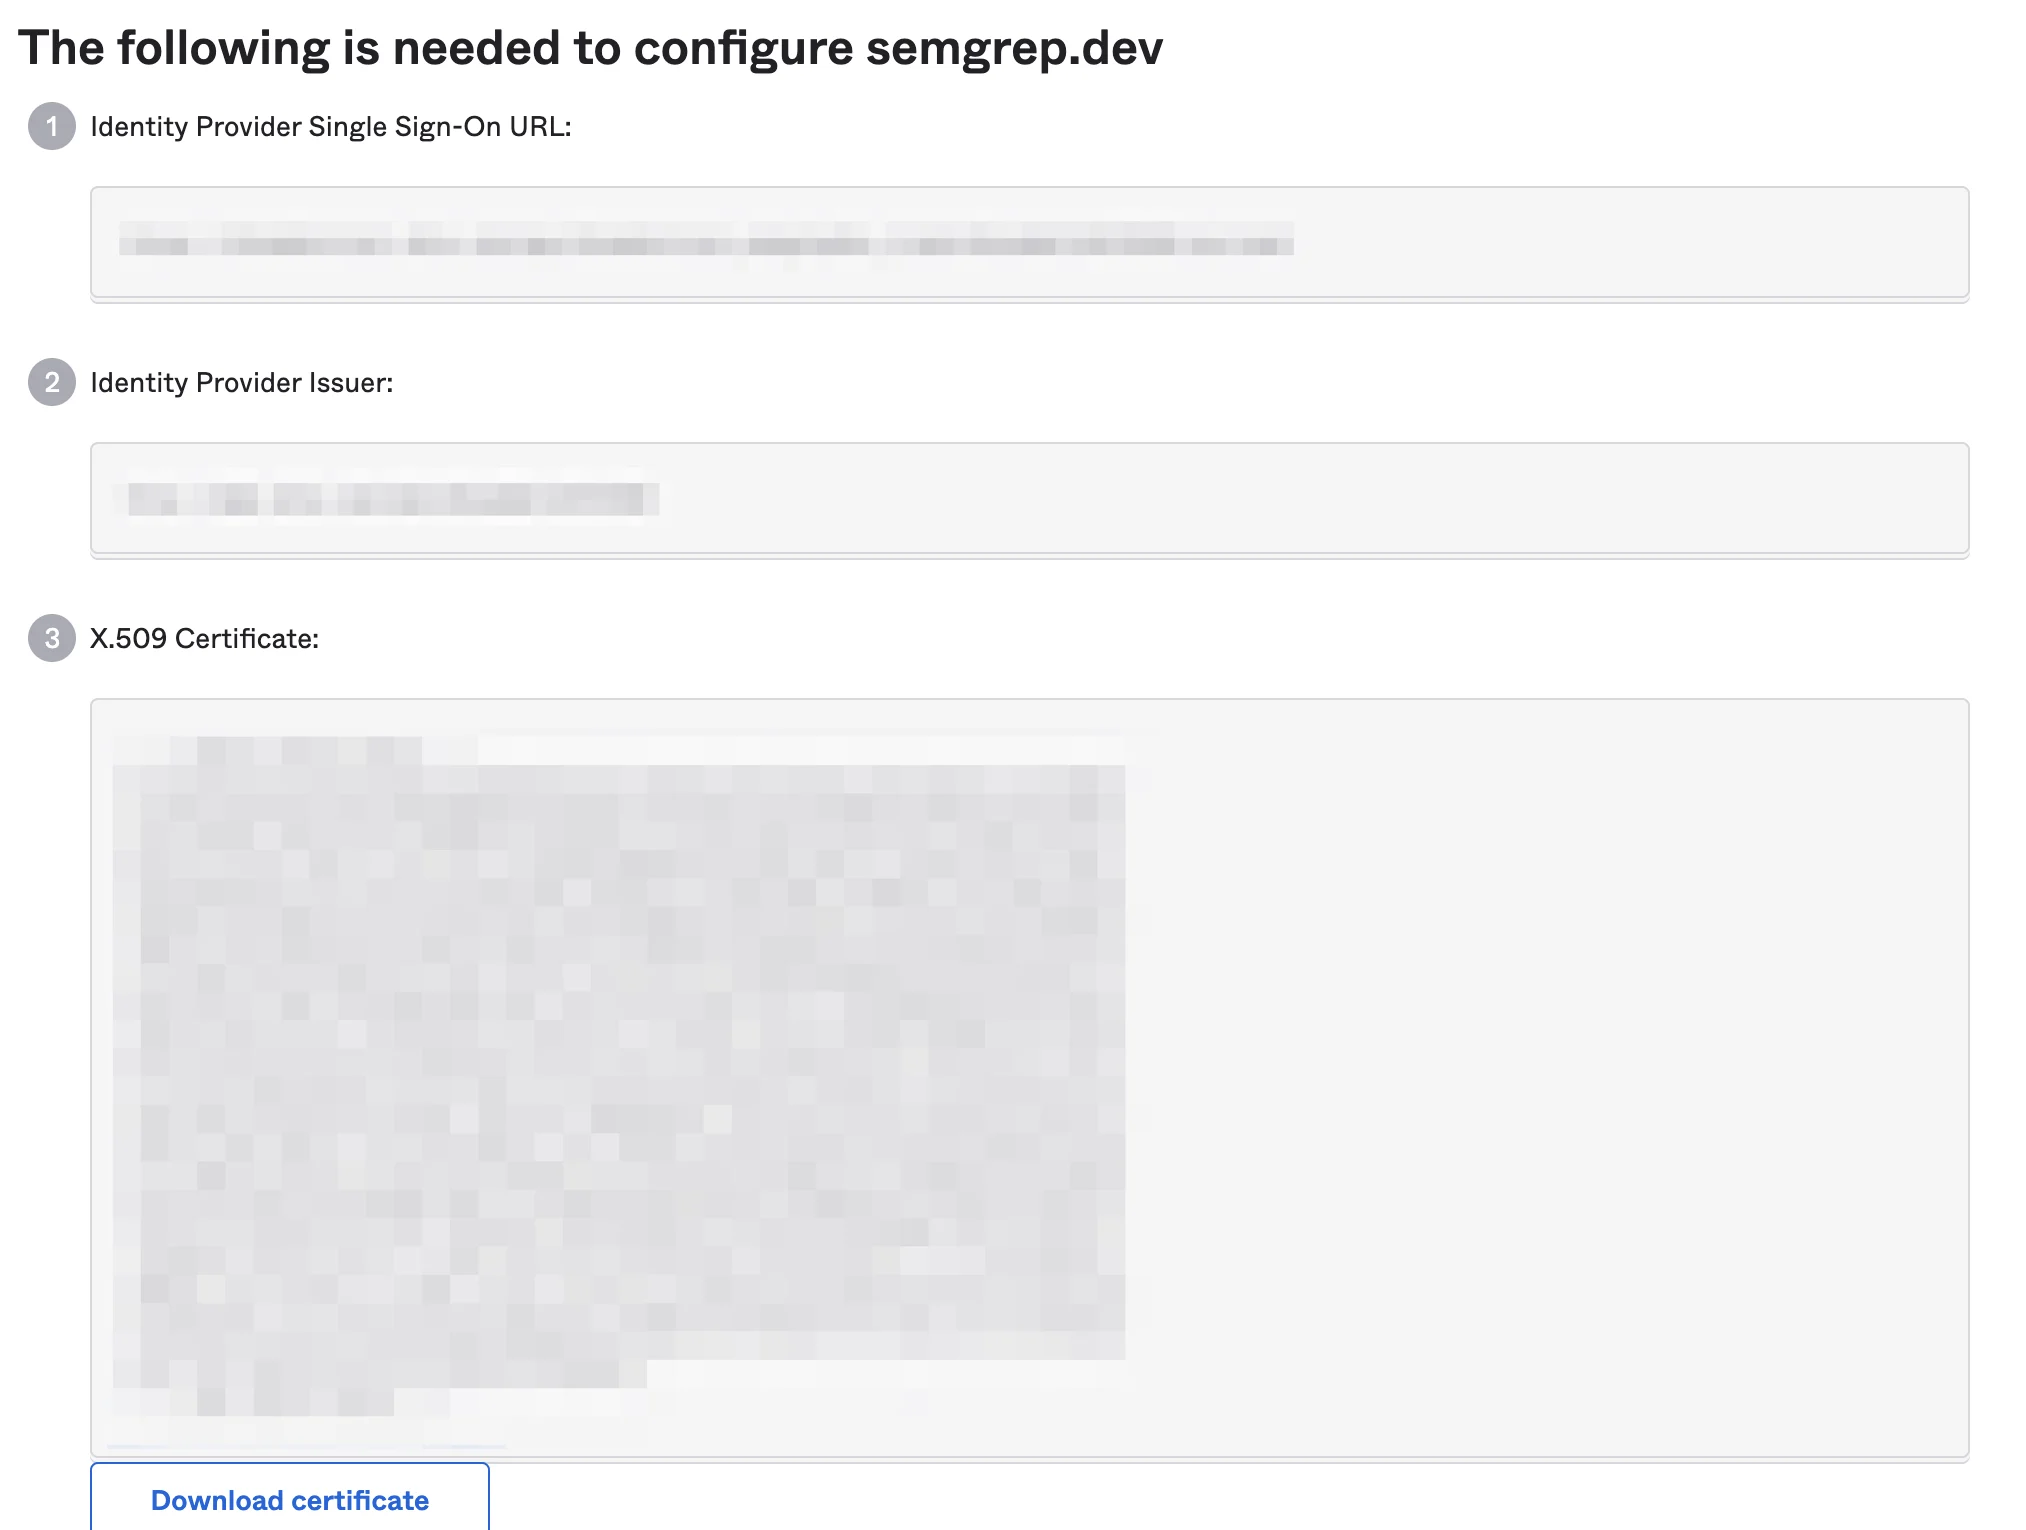
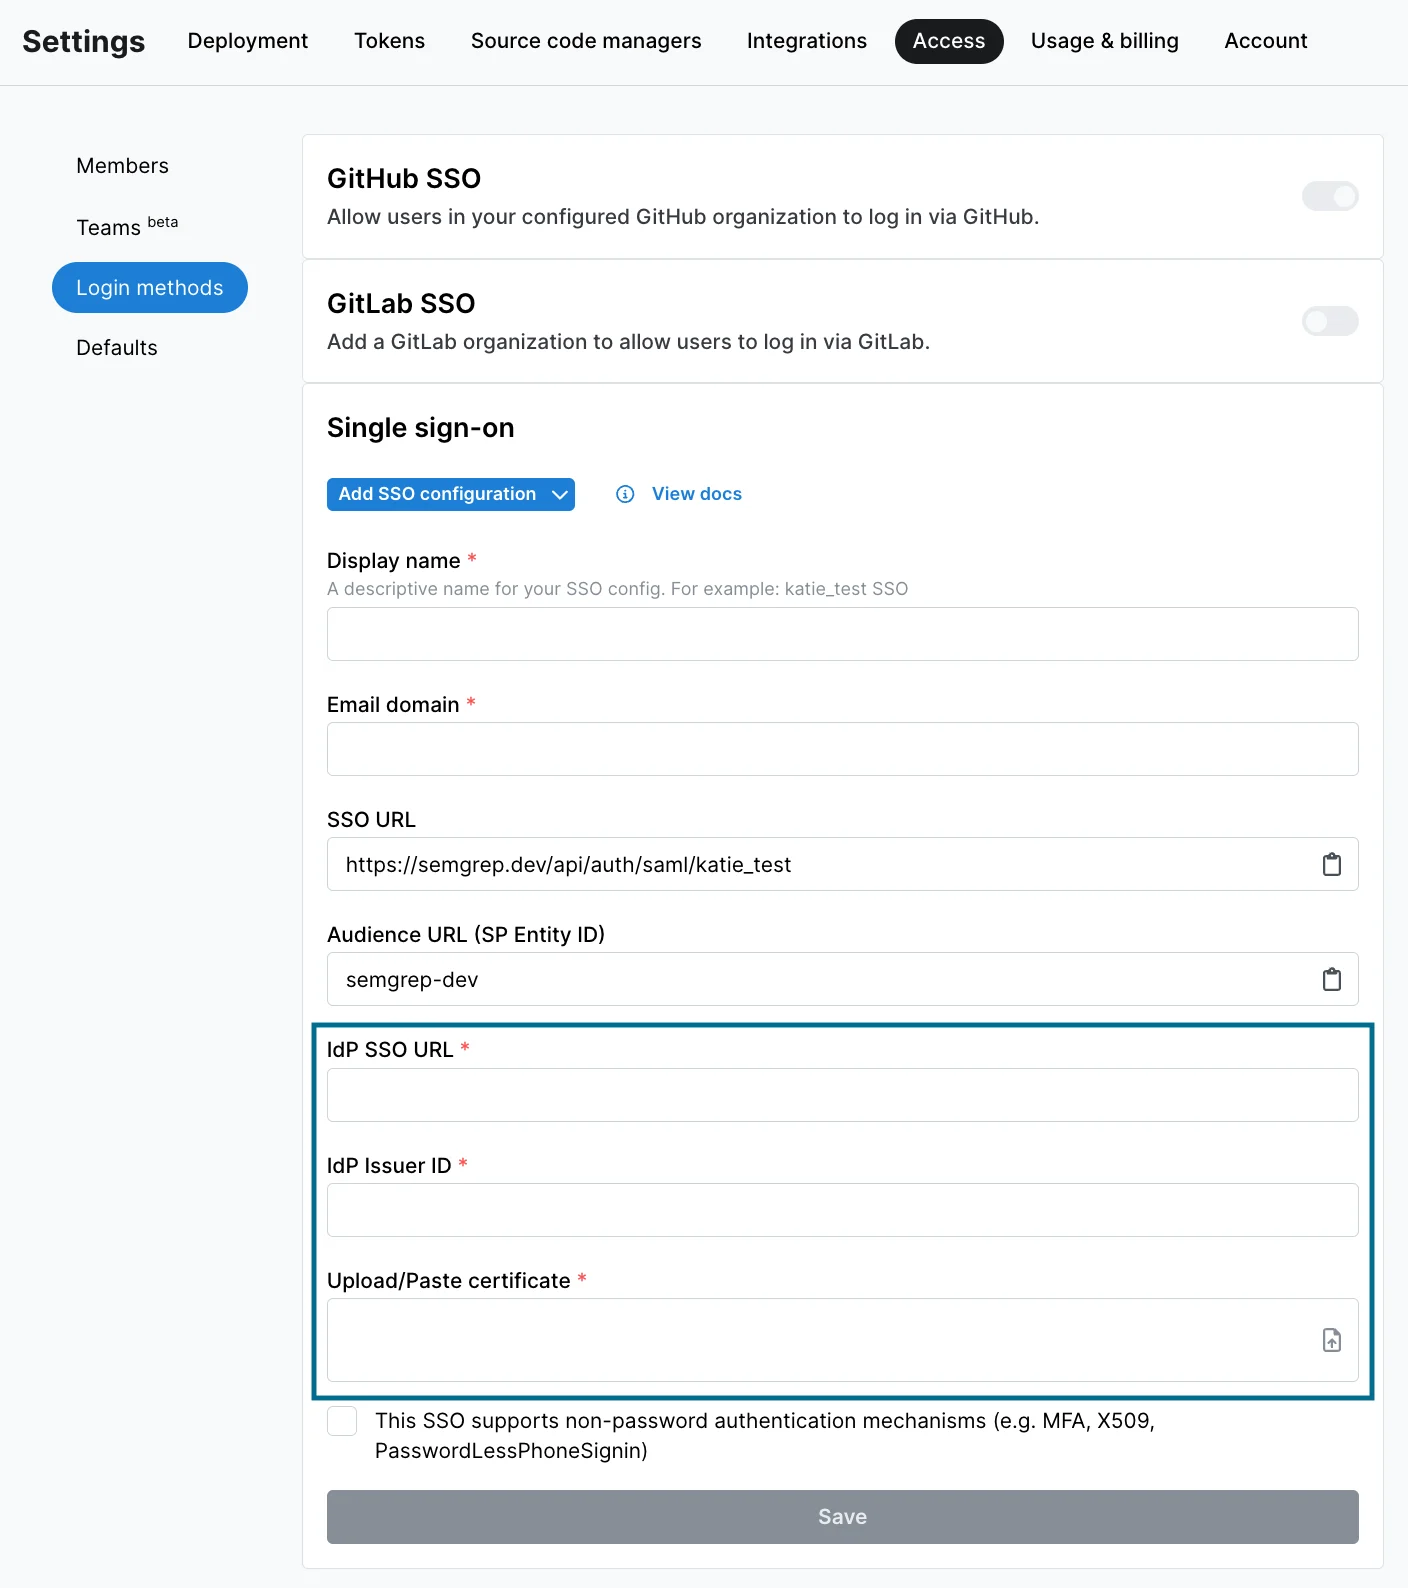
Follow the instructions provided on the subsequent Configure Single Sign-On dialog pages to complete this process. If prompted, add in the requested attribute statements. Semgrep recommends the following mappings:
8
Once test sign-in has passed, close the test page. Verify that the Connection details shown on the Connection activated screen are correct and close the dialog.
9
Verify that the Connection status is now active under the Single sign-on (SSO) section in Semgrep AppSec Platform.
10
To use the new connection, log out of Semgrep, then log back in using SSO.
ADMIN AND ORG OWNER ACCOUNTSBy default, Semgrep creates new SSO accounts with the Member role assigned. You can change the default role assigned to a new user by going to Settings > Access.If you’re an admin setting up SSO, and Semgrep creates an SSO account for you with the role of Member, you can elevate the permissions granted to your SSO account. To do so, log in to Semgrep with your admin account using the original login method, then change the role of your newly created SSO account to Admin.
Turn off sign in with GitHub / GitLab
If you have SSO enabled, you can turn off login using GitHub or GitLab credentials. Doing so forces members of your organization to log in using an email address with an approved domain.1
Sign in to your Semgrep account.
2
Navigate to Settings > Access > Login methods.
3
GitHub users: Click the GitHub SSO toggle to turn off logins using GitHub.
4
GitLab users: Click the GitLab SSO toggle to turn off logins using GitLab.